Do you want to add rich snippets on your WordPress site?
Rich snippets allow you to have custom search listings for special content such as reviews, recipes, events, and more. These search listings will stand out and help get more traffic to your site.
In this article, we’ll show you how to add rich snippets to your WordPress site, step by step.
Why Use Rich Snippets on Your WordPress Site?
Rich snippets use what’s called schema markup to provide extra information about your content to the search engines.
The search engine bots use this data to show additional information about your posts and pages in the search results.

This helps to make your posts and pages stand out more in the search results, which can improve your organic click through rate and help you increase your blog traffic.
It also helps you build authority in your niche, as your site becomes more visible in the search.
Rich snippets are not just for review sites or recipes. You can use rich snippets for events, products, people, video, music, apps, articles, blog posts, and more.
Note: It’s important to know that adding schema markup to your website doesn’t guarantee that Google will display it. Google may choose not to for some searches. However, adding the schema markup helps Google to understand your content and makes it much more likely to display rich snippets.
That being said, let’s show you how to add rich snippets to WordPress. Simply use the quick links below to jump straight to the method you want to use.
- Adding rich snippets in WordPress with a WordPress plugin (Recommended)
- Adding rich snippets in WordPress by adding code to WordPress
Method 1. Adding Rich Snippets in WordPress Using a WordPress Plugin
The easiest way to add rich snippets to WordPress is by using the AIOSEO plugin. It’s the best WordPress SEO plugin in the market, used by over 3+ million websites.

It helps you easily optimize your site for search engines without the need to hire an SEO expert. Plus, you can set up rich snippets on your site in a couple of clicks.
Note: You’ll need the pro version of AIOSEO since it includes schema markup functionality and other features like XML sitemaps, a redirection manager, and more. There is a free version of the plugin you can use to get started.
The first thing you need to do is install and activate the AIOSEO plugin. For more details, see our beginner’s guide on how to install a WordPress plugin.
Upon activation, you’ll immediately be taken to the AIOSEO setup wizard. You need to click the ‘Let’s Get Started’ button.
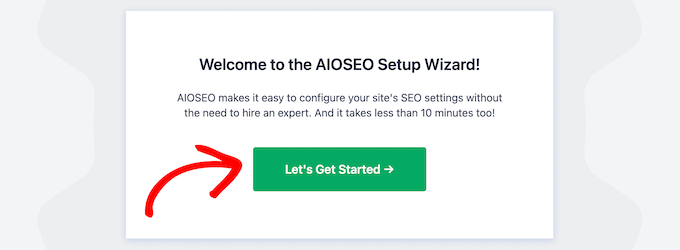
If the setup wizard doesn’t immediately show up, then simply go to All in One SEO » Dashboard.
From here, you can click the ‘Launch the Setup Wizard’ button. This will walk you through the steps of setting up the plugin for your website.

As you go through the setup wizard, you’ll need to activate the ‘Advanced Rich Snippets + Schema Markups’ addon.
Simply check the box so that it turns blue, then click the ‘Save and Continue’ button.

On the final screen, you need to enter your license key and then click the ‘Connect’ button.
You can find this information under your account page on the AIOSEO website.

For more details, see our ultimate guide on how to set up AIOSEO for WordPress correctly.
After that, you can go to AIOSEO » Search Appearance in your WordPress admin panel, and then click on the ‘Content Types’ tab.

Then, you can set the schema markup type for your posts and pages.
Simply click the ‘Schema Markup’ menu option, then you can choose the schema type from the drop-down.
You will be able to see different content types that you can create with the plugin. The list includes:
- Course
- Product
- Recipe
- Software/App
- FAQ
- Web page
- Profile
- Article
Clicking on any content type will show you the fields that will be available.

These settings will be the default settings when you add a new blog post. However, you can change these on an individual post basis too.
Below the post schema markup, you can also control the default schema for your pages.
Simply select the ‘Schema Type’ from the drop-down. Then, you’ll have additional options for the schema type you select.

Once you’re finished making changes, click the ‘Save Changes’ button before you leave the page.
Adding Rich Snippet Information to Your Posts and Pages
Now, you can add schema information to your individual posts and pages, so they’ll display with unique rich snippets in the search results.
To do this, simply open up a blog post and scroll down below the post editor. Here you’ll see a meta box called ‘AIOSEO Settings’.
You need to click the ‘Schema’ tab and then click on the ‘Generate Schema’ button.

This will open up the Schema Catalog. Simply click the ‘Add Schema’ button next to the type of schema you want to add.
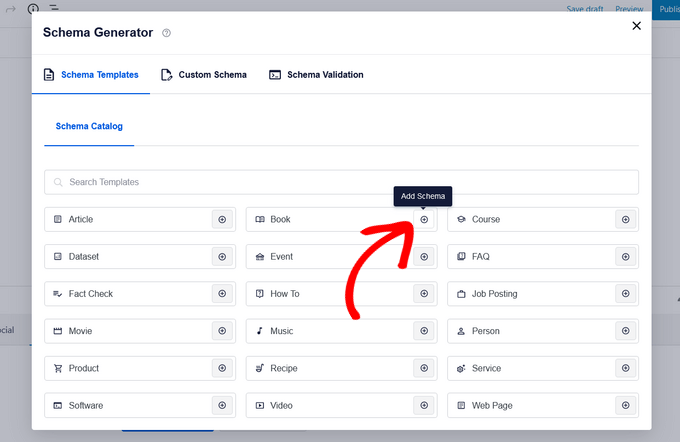
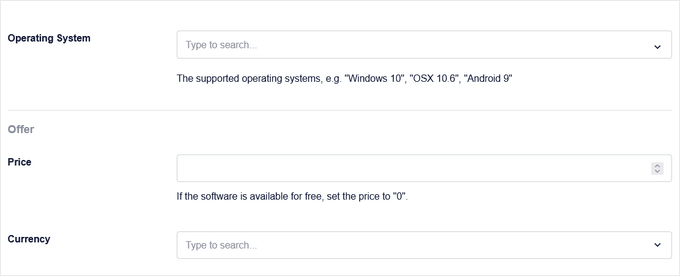
Now, there will be different fields available to fill out, based on the option you select. For example, the ‘Software’ schema type includes fields for the name, operating system, price, description, review, and more.
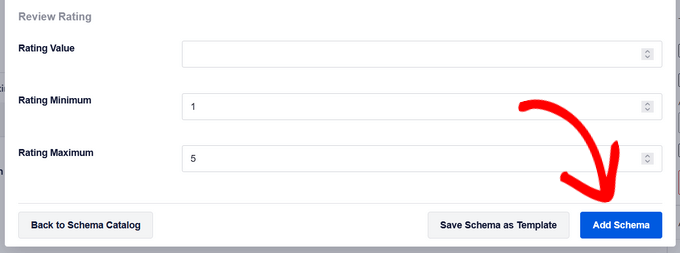
Once you’re finished, click the ‘Add Schema’ button. Don’t forget to click ‘Update’ or ‘Publish’ on the post to save your changes as well.
Adding schema markup to individual WordPress pages is similar. You need to open up the page you want to edit and then scroll down to the ‘AIOSEO Settings’ meta box below the page editor.
Then, click the ‘Schema’ menu option, click the ‘Generate Schema’ button, and select your page schema type from the Schema Catalog.

Different options will appear depending on the type of schema you select.
Just like above, when you’re finished, you need to click the ‘Add Schema’ button and hit ‘Update’ or ‘Publish’ on the page to make your changes live.
Adding rich snippet information won’t make a difference on the front end of your WordPress blog. However, you’ll be giving the search engine bots extra data to display with your posts and pages in the search results.
Method 2. Adding Rich Snippets by Adding Code to WordPress
Another way to add rich snippets to WordPress is by adding code to WordPress. If you haven’t done this before, then see our guide on how to copy and paste code in WordPress.
Rich snippets or structured data markup can be written into three different vocabularies. These vocabularies are microdata, RDFa, and JSON-LD. You can use any of them on your site. However, most beginners find RDFa to be more beginner friendly.
Here is an example of a user’s about page in WordPress. Normally the text of the page will look something like this:
John Smith
<img src="johnsmith.jpg" alt="Photo of John Smith"/>
Support Technician
342 Acme Inc.
101 Washington Avenue
Eagleton IN 98052
(425) 123-4567
<a href="mailto:johnsmith@example.com">johnsmith@example.com</a>
Website:
<a href="http://www.example.com">example.com</a>
This can be easily transformed with rich snippets.
If you are familiar with HTML, then you can easily understand the following example:
<div vocab="http://schema.org/" typeof="Person">
  <span property="name">John Smith</span>
  <img src="johnsmith.jpg" property="image" alt="Photo of John Smith"/>
  <span property="jobTitle">Support Technician</span>
  <div property="address"  typeof="PostalAddress">
    <span property="streetAddress">
      342 Acme Inc.
      101 Washington Avenue
    </span>
    <span property="addressLocality">Eagleton</span>,
    <span property="addressRegion">IN</span>
    <span property="postalCode">46818</span>
  </div>
  <span property="telephone">(425) 123-4567</span>
  <a href="mailto:johnsmith@example.com" property="email">johnsmith@example.com</a>
Website
  <a href="http://example.com" property="url">example.com</a>
</div>
For each content type, there are some special properties that need to be defined.
Schema.org is the organization that helps maintain the standard for different content types. You will find extensive documentation with examples for each schema content type on their website.
Here is another example of a recipe with rich snippets.
<div vocab="http://schema.org/" typeof="Recipe">
  <span property="name">Mom's World Famous Banana Bread</span>
  By <span property="author">John Smith</span>,
    <img property="image" src="bananabread.jpg"
    alt="Banana bread on a plate" />
  <span property="description">This classic banana bread recipe comes
  from my mom -- the walnuts add a nice texture and flavor to the banana
  bread.</span>
  Prep Time: <meta property="prepTime" content="PT15M">15 minutes
  Cook time: <meta property="cookTime" content="PT1H">1 hour
  Yield: <span property="recipeYield">1 loaf</span>
  Ingredients:
  - <span property="recipeIngredient">3 or 4 ripe bananas, smashed</span>
  - <span property="recipeIngredient">1 egg</span>
  - <span property="recipeIngredient">3/4 cup of sugar</span>
  ...
  Instructions:
  <span property="recipeInstructions">
  Preheat the oven to 350 degrees. Mix in the ingredients in a bowl. Add
  the flour last. Pour the mixture into a loaf pan and bake for one hour.
  </span>
</div>
If you are manually adding rich snippets into your WordPress posts, then you will need to manually add HTML to WordPress. For more details, see our beginner’s guide on how to edit HTML in WordPress code editor.
You may also need to refer to Google’s Developer resource on structured data to understand which properties are required for each content type.
Testing Your Rich Snippets and Schema Markup
If you’re adding rich snippets manually, then you’ll want to make sure you’ve added the structured data to your WordPress website properly.
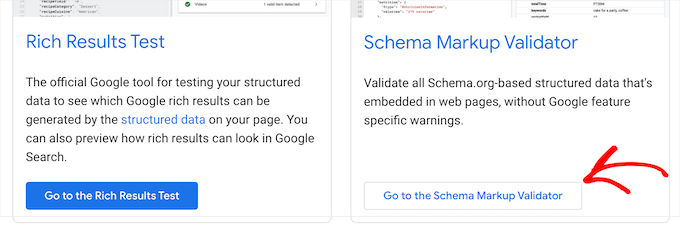
To check your rich snippets, simply head over to the Google Structured Data Testing Tool. Then, there are two different tests you can run to test your structured data.
First, click the ‘Go to the Rich Results Test’ button. This will see what rich results can be generated for your page.

Then, enter your page or post URL into the box.
Next, click the ‘Test URL’ button.

This will automatically generate a report to see which rich results features can appear when that page or post is listed in the search results.
It will give you any errors or warnings, so you can improve your structured data. You can click the drop-down arrow next to any warning, and you’ll get detailed instructions on how to fix it.

Next, you can test your schema markup by going back to the Google Structured Data Testing Tools page.
Then, click the ‘Go to the Schema Markup Validator’ button.
Next, enter your URL or code snippet into the ‘Test your structured data’ popup.
Then, click the ‘Run Test’ button.

The tool will automatically analyze your code to see if there are any errors.
You’ll want to see 0 errors on the right-hand side of the page.

We hope this article helped you learn how to use rich snippets on your WordPress site. You may also want to see our guide on how to choose the best domain name registrar and our expert picks of the best AI chatbots software for your website.
If you liked this article, then please subscribe to our YouTube Channel for WordPress video tutorials. You can also find us on Twitter and Facebook.
The post Beginner’s Guide: How to Use Rich Snippets in WordPress first appeared on WPBeginner.
Leave A Comment
You must be logged in to post a comment.