Do you want to add a currency converter to your blog?
A currency converter allows your website visitors to quickly calculate the exchange rate of different currencies without leaving your website.
In this article, we will show you how to easily add a currency converter in WordPress.
What Type of Websites Need a Currency Converter?
Whether you have an online store, a small business website, or a WordPress blog, as long as you have an international audience and you’re selling something, then you can use a currency converter.
Here are a few examples of websites that may need a currency calculator for WordPress:
- Ecommerce stores: If you are running an ecommerce store with WordPress and selling products internationally, then a currency converter can help your users quickly calculate costs in their local currency.
- Travel blogs: If you own a travel blog, then a currency calculator can help your users calculate travel costs in different currencies.
- Business websites: A business website may also want its users to see the exchange rates of different currencies. Particularly, businesses with a presence in different countries.
- Finance and banking websites: Websites in the finance and banking industries can add currency calculators for their visitors to calculate conversion rates without leaving their website.
- Coin and forex exchange sites: There are many websites that blog or deal with crypto-currencies, forex trading, and similar niches. These websites need a currency converter so that their users can quickly calculate conversion rates.
There can be many other WordPress websites that may need a currency converter. That being said, let’s take a look at how to easily add a currency converter in WordPress.
We will show you 2 methods, including a way for WordPress site and WooCommerce store. You can click the links below to jump ahead to your preferred section:
Adding a Currency Converter in WordPress
You easily add a currency converter in WordPress using CBX Currency Converter. It is a free WordPress plugin that calculates and displays up to 117 currencies.
The first thing you need to do is to install and activate the CBX Currency Converter plugin. For more details, see our step-by-step guide on how to install a WordPress plugin.
Upon activation, you need to go to Settings » Currency Converter page in your WordPress admin area. From here, you can manage general settings, like choosing a layout for your currency converter and selecting your API source to fetch the exchange rates.
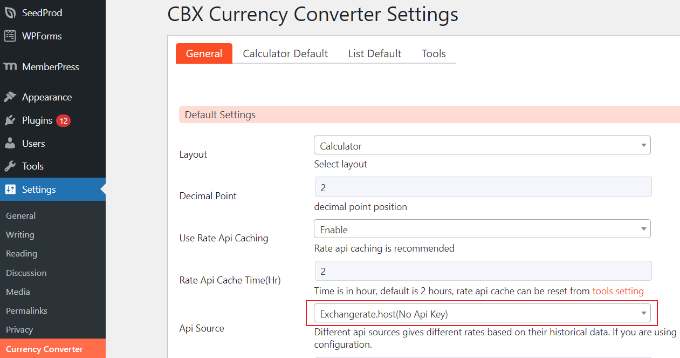
By default, the plugin will use Exchangerate.host, which doesn’t requires an API key. However, you can click the dropdown menu and choose other sources, like Alphavantage, Openexchangerates, and Currencylayer.
After adding the API key, you can select a layout for the currency converter.
There are 4 layouts to choose from. Using these layouts, you can display a currency calculator, exchange rate list, or both. You can also define the decimal point position.
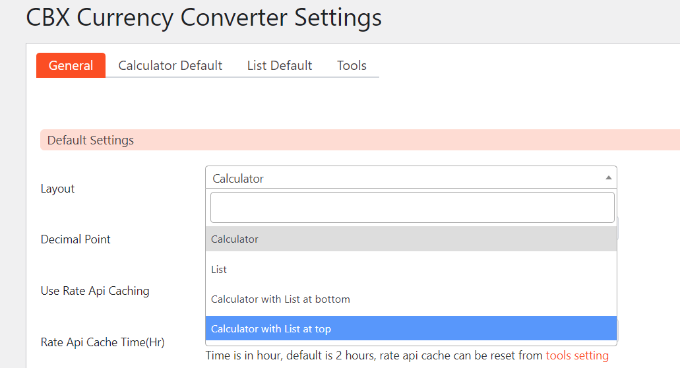
Besides that, you can further edit the settings for each currency converter layout.
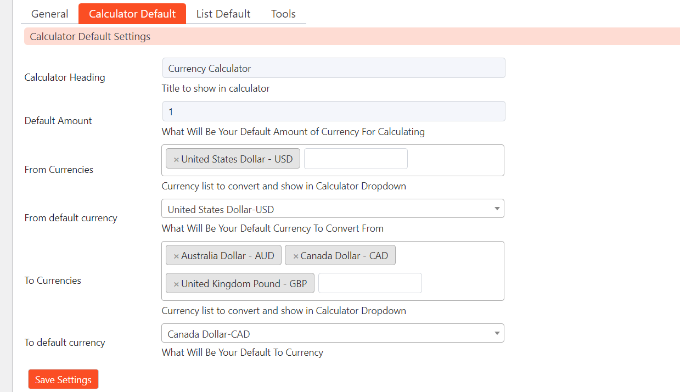
For instance, in the ‘Calculator Default’ tab, you can set the default values for the currency calculator. It allows you to enable currencies, set default options for from and to currencies, and more.
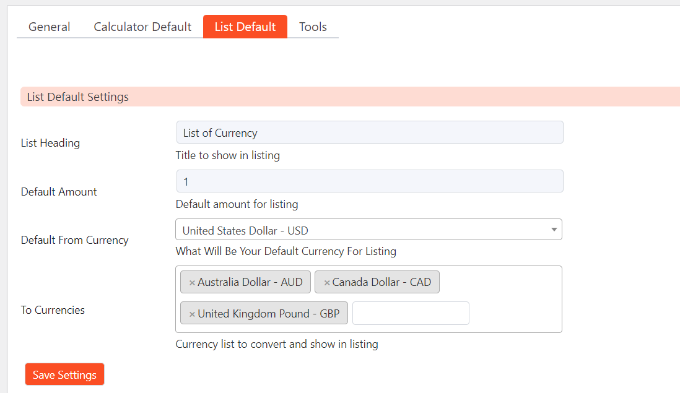
After the calculator layout, you can go to the ‘List Default’ tab for currency rate list default settings.
You can select the primary currency and then add a list of other currencies to display in the rate list.
Once you are done with the settings, click the ‘Save Changes’ button. Make sure to perform this step whenever you change any settings in the above tabs.
Displaying the Currency Converter on Your Site
You can easily display the currency converter anywhere on your website using the CBX Currency Converter block.
First, you can create a new page or edit an existing one. Once you’re in the content editor, simply click the ‘+’ button and add the CBX Currency Converter block.
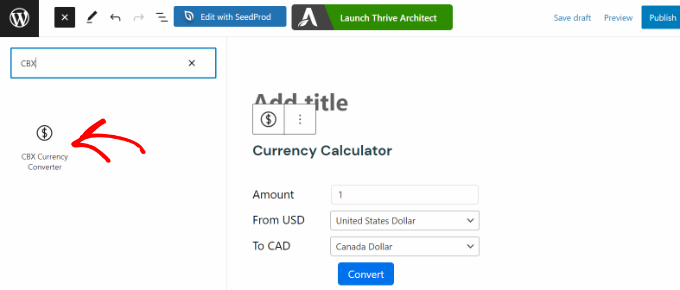
Alternatively, you can also display the currency converter in the sidebar of your website.
You can go to Appearance » Widgets from your WordPress dashboard. After that, you can simply add the ‘CBX Currency Converter’ widget block to the sidebar area.
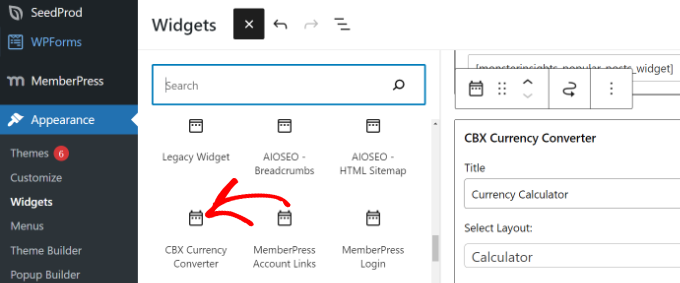
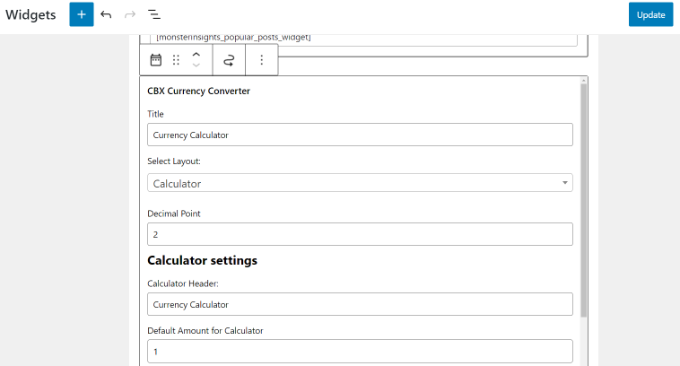
After adding the widget block, you can edit the title, select a layout, change the decimal points, choose the default currency, and more.
Once you’re done, simply click the ‘Update’ button.
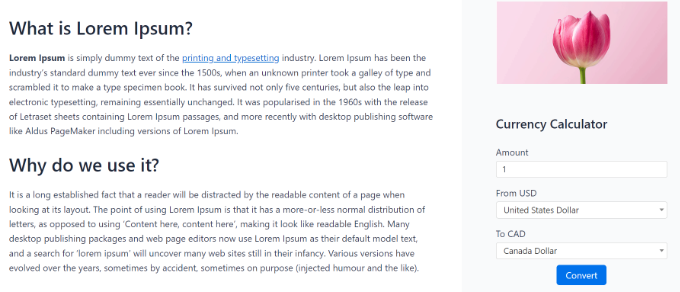
Simply visit your website to see the currency converter in the sidebar widget or WordPress page.
Your users will be able to enter an amount, select the currency they want to check, and then click the ‘Convert’ button to have the results displayed right there.
You can also integrate a currency converter in your WooCommerce or any other WordPress ecommerce site. For this, you will need the Currency Converter Pro plugin.
However, other multi-currency plugins will also get the job done, most of which are free. Let’s look at how you can add a currency converter in WooCommerce.
Adding a Currency Converter in WooCommerce
If you have a WooCommerce store that attracts customers from different parts of the world, then a currency converter can show prices in local currencies and boost conversions.
The easiest way of adding a currency converter in WooCommerce is by using the CURCY plugin. It is a free WooCommerce plugin that is easy to use and offers multi-currency support.
First, you will need to install and activate the CURCY plugin. For more details, please see our guide on how to install a WordPress plugin.
Upon activation, you can head to the Multi Currency page from the WordPress dashboard and view the General settings tab.
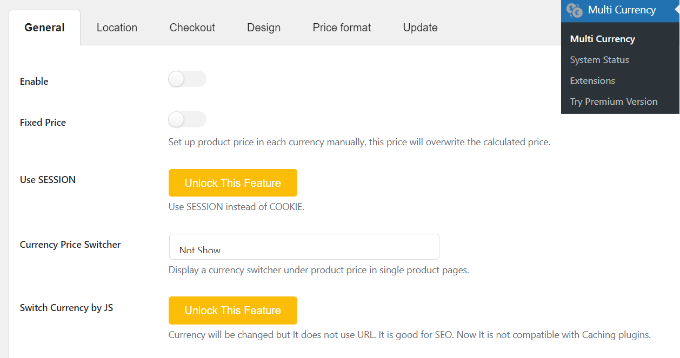
Here, you can click the ‘Enable’ toggle to activate currency converter options for WooCommerce. Besides that, the plugin also lets you fix the prices.
Next, you can scroll down and add different currencies. Simply click the ‘Add Currency’ button. Do remember that in the free plugin, you can only add 2 currencies at a time.
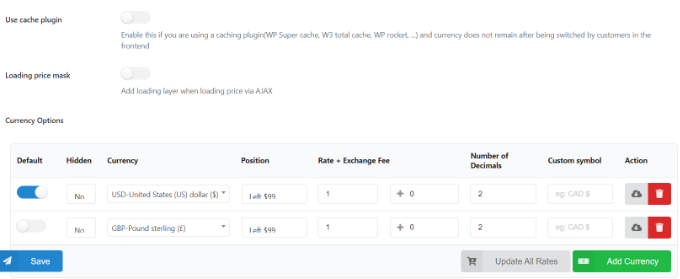
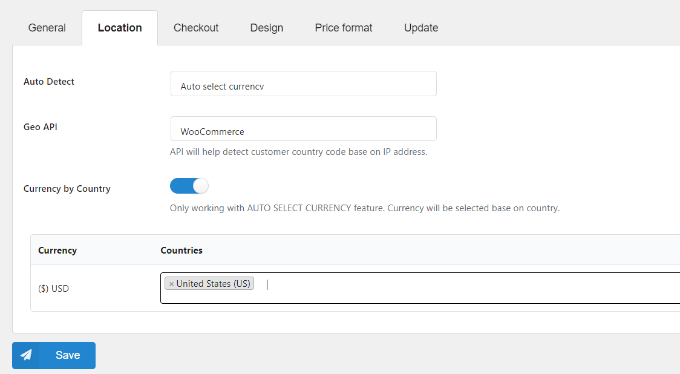
After that, you can switch to the ‘Location’ tab.
Here, you’ll find options to auto-detect currencies and show a particular currency for visitors from different locations.
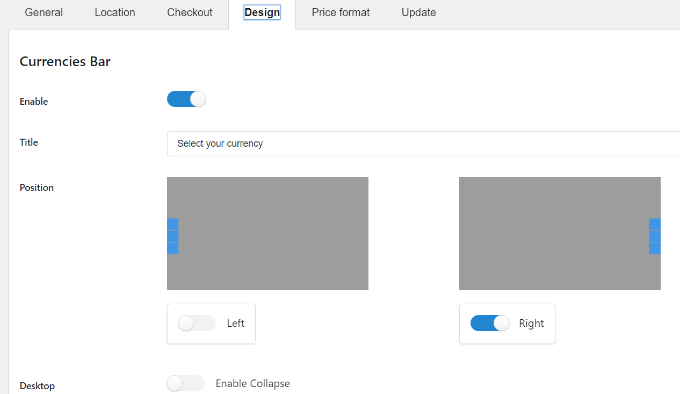
Next, you can head to the ‘Design’ tab and edit your currency converter’s appearance.
The plugin lets you choose its position, add a title, change the text color, style, main and background color, and much more.
Once that’s done, you can save your changes.
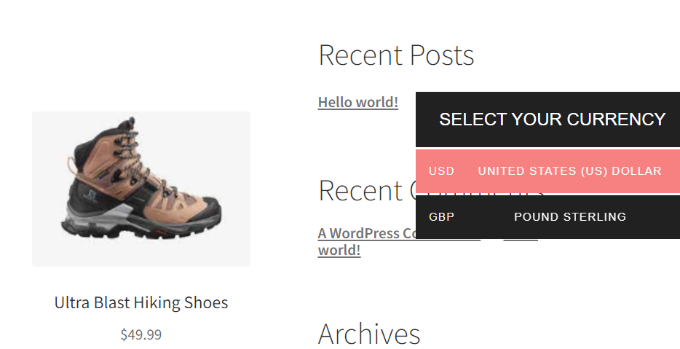
You can now visit your WooCommerce store to see the currency converter in action.
We hope this article helped you learn how to add a currency converter in WordPress. You may also want to see our expert pick of the best calculator plugins for your WordPress site, and how to customize your WooCommerce cart page.
If you liked this article, then please subscribe to our YouTube Channel for WordPress video tutorials. You can also find us on Twitter and Facebook.
Leave A Comment
You must be logged in to post a comment.