Are you looking for ways to fix your featured image not showing in WordPress?
Featured images give visitors a glimpse of what’s to come in your blog posts and pages. So, when they don’t appear on your site, it can be frustrating and immediately hurt your click-through rates.
That said, in this article, we’ll show you how to fix featured images not appearing in WordPress so that your content gets more clicks and engagement.
Why Isn’t the Featured Image Showing in WordPress?
Featured images appear on your blog post list page and sometimes on the post’s header. Similar to YouTube thumbnails, the goal of the featured image is to increase pageviews and user engagement.
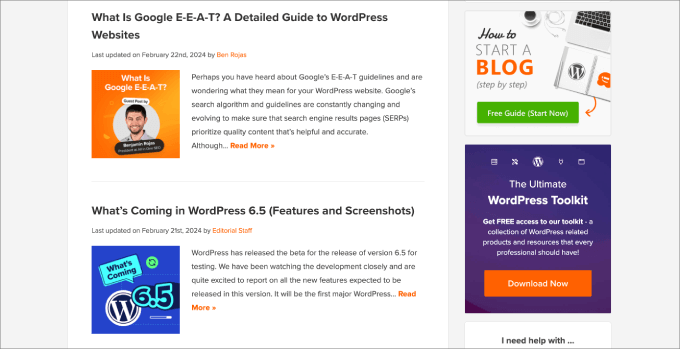
What’s more, featured images are also used to represent individual articles in recent posts and archive and search pages.
Beyond that, the style of your featured images sets the tone for the rest of your blog post.
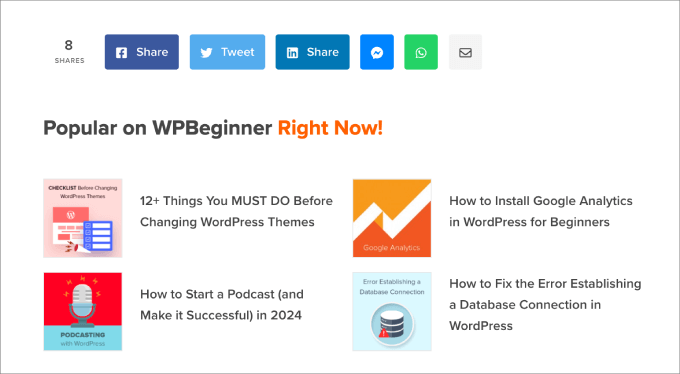
Just about all WordPress themes allow you to upload featured images and give you the ability to display them across different areas of your site, such as the sidebar menu or the main content area.
If you’re troubleshooting this issue, you may want to check out our tutorial on how to add featured images or post thumbnails in WordPress. It’s important that you know how to upload featured images first.
It can be easy to mistakenly upload a cover image instead of a featured image, or you might even have a theme that adds the first image in a post to appear as a post thumbnail automatically.
With that in mind, let’s dive into how to fix potential issues that may come up. Feel free to use our links to jump to the problem that you’re currently facing.
1. Fix the HTTP Error When Uploading a Featured Image
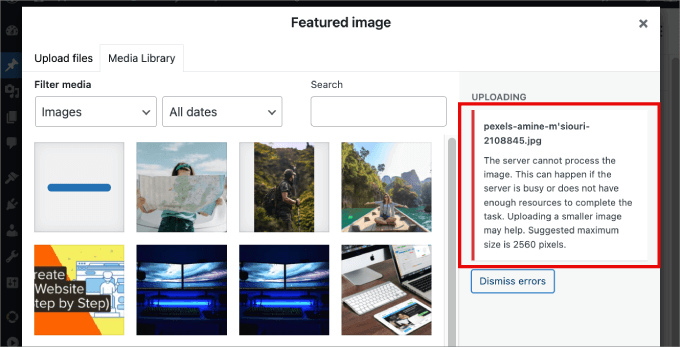
If you try uploading a featured image with a large file size, you may get the vague ‘HTTP error’ message. Often, this means that the image file is too large or that you need to increase your site’s memory limit to allow for larger uploads to your WordPress site.
There are two main ways to fix this problem. But first, be sure to log out of WordPress and then back in. Many times, that will allow you to upload images as normal once again.
If not, then try one of the two following methods:
- Decrease the image file size.
- Increase the WordPress memory limit.
First, let’s start with the simpler method, decreasing your image file size. If size is an issue, you may want to switch to the WebP, JPEG, or PNG image format. JPEG is a compressed file format that slightly reduces image quality to significantly reduce it to a smaller file size, and WebP files are very small to begin with.
Next, you’ll want to compress the file size using an image compression tool such as TinyPNG or JPGmini.
All you have to do is upload the image to the tool, and then you can download the compressed version of the file.
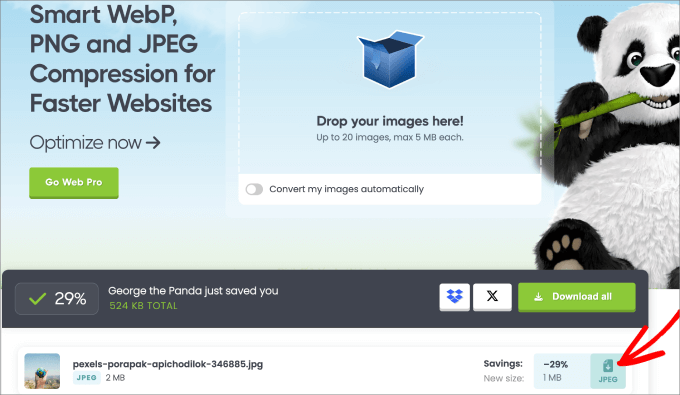
For more information, take a look at our guide on how to optimize images for web performance without losing quality.
If you’ve already compressed the image size and are still dealing with the HTTP error, you might want to increase your WordPress memory limit. You could simply contact your current web hosting provider and request to expand your PHP limit or upgrade your hosting plan.
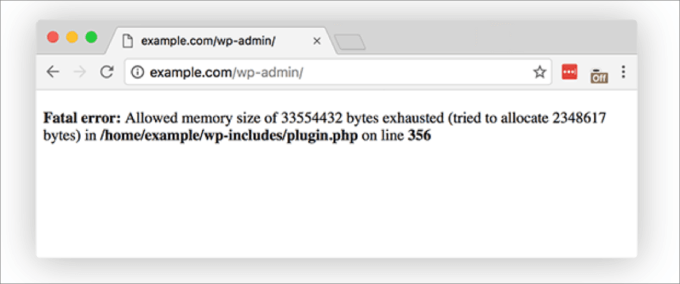
However, you can also change the PHP memory limit, which requires that you modify the wp-config.php or .htaccess files. In both cases, you will need an FTP client or File Manager.
For this method, it’s a good idea to use a plugin like WPCode, which allows you to add customizations without breaking your website. WPCode is the best code snippets plugin on the market, with over 2,000,000 million websites that use it to future-proof their website customizations with code snippets.
If you want to edit the .htacess file, you will need to head over to the WordPress website’s root folder. Then, before the line that says ‘#END WORDPRESS,’ You can paste the following code:
define( 'WP_MEMORY_LIMIT', '256M' );
For more details on how to increase your memory limit, check out our tutorial on how to fix WordPress memory exhausted errors to increase PHP memory.
2. Fix the Plugins or Themes
Some WordPress themes and plugins could be restricting the image from appearing.
While most WordPress themes automatically display your featured images, some require manual setup by the admin. In that case, you may need to check your WordPress theme settings or reach out to your theme’s support for help.
For more information, check out our ultimate guide on how to use WordPress Theme Customizer.
If the theme isn’t causing the issue, you can also check if your plugins are the primary culprit.
Start by updating all of your plugins.
If that doesn’t fix the issue, go ahead and deactivate all of your plugins and then reactivate them one by one.
After each installation, you can check to see if the featured images are showing up probably. If the featured image fails, then you’ll know which plugin is causing the issue.
You can also use the Health Check & Troubleshooting plugin. This free plugin performs a series of checks to detect configuration and known errors in your plugins and themes.
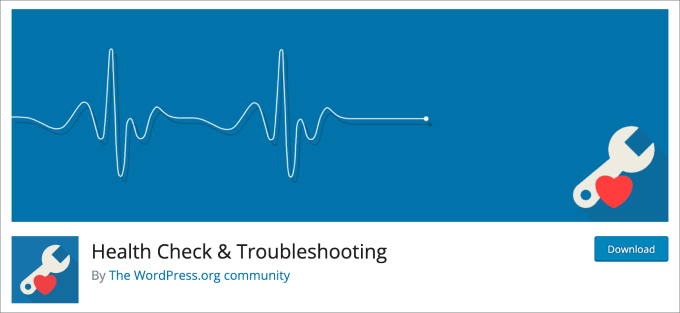
If you need help with installation, read our guide on how to install a WordPress plugin.
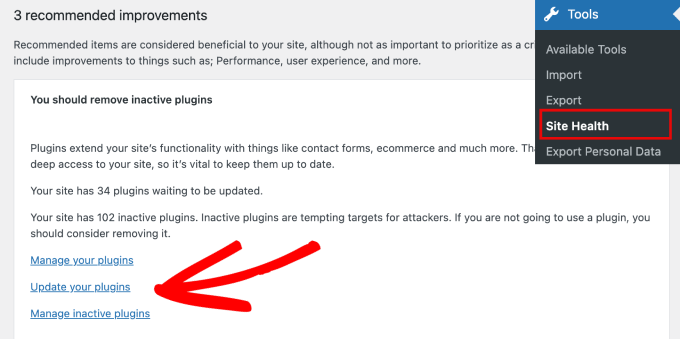
Upon activation, head over to Tools » Site Health. From here, you’ll get a list of recommendations to help you improve your WordPress security and performance.
You can see here that there are a number of outdated and inactive plugins and themes installed that need to be addressed. Simply click on the given links to manage or update your plugins.
3. Disable Lazy Loading
Lazy loading is a feature that helps to improve your page speed and WordPress performance by quickly adding content and the visible area first.
A faster website improves website rankings since search engines like Google consider speed to be an important ranking factor.
Basically, lazy loading stops the loading of images on a page until it comes into view on the screen. For example, the last image in a long blog post won’t have to load until the user actually scrolls down and reaches that image.
That said, lazy loading can cause issues with featured images since some lazy-loading plugins could treat featured images as normal photos. This could cause the featured image to load slowly or block it entirely from appearing on the recent posts list.
Also, some image optimization plugins will have lazy loading functionality as an add-on. Thus, you’ll want to check each plugin installed to see if this feature is enabled.
You may want to turn off the lazy loading feature in your plugins and clear the cache to see if it resolves the feature image problem.
Some plugins allow you to exclude certain photos from lazy loading. If that’s the case, you can disable this feature only for the first image of your blog posts so that you can still benefit from lazy loading without affecting your featured images.
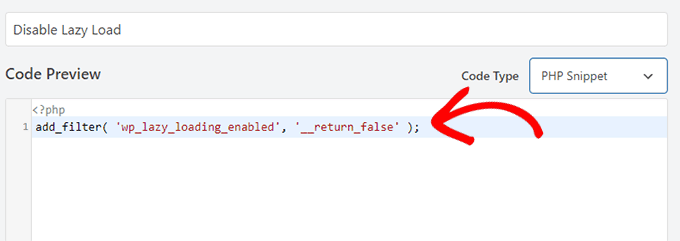
You can easily disable code by customizing the code snippet with WPCode. First, you’ll need to head over to the Code Snippets » + Add Snippet page from the WordPress dashboard.
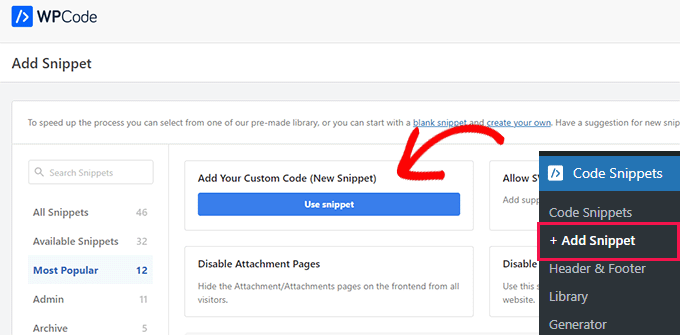
Then, all you would do is copy and paste this PHP code into the ‘Code Preview’ box:
add_filter( 'wp_lazy_loading_enabled', '__return_false' );
This is how it should look when pasted.
Make sure to also select ‘PHP Snippet’ as the Code Type.
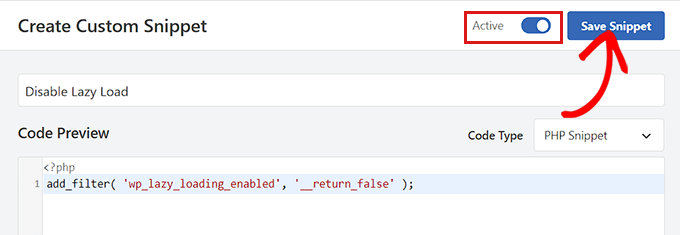
Lastly, make sure you turn on the plugin so that it’s active and hit the ‘Save Snippet’ button.
For more details, check out our step-by-step tutorial on how to properly disable lazy load in WordPress.
4. Change User Role Permissions to Allow for Featured Image Uploading
WordPress offers six default user roles to manage all the user’s access and actions on a site.
If you’re not the website owner, chances are you may not have the required user role to upload or view featured images.
All you have to do is to ensure that your user roles and permissions are set up properly.
An easy way to fix this issue is to use a plugin like User Role Editor so you can change roles and capabilities in one place.
Simply head over to Users » User Role Editor in your WordPress dashboard.
From here, you’ll select the role that you want to change under ‘Select Role’ and change its capabilities. In this case, we’ll choose the Author.
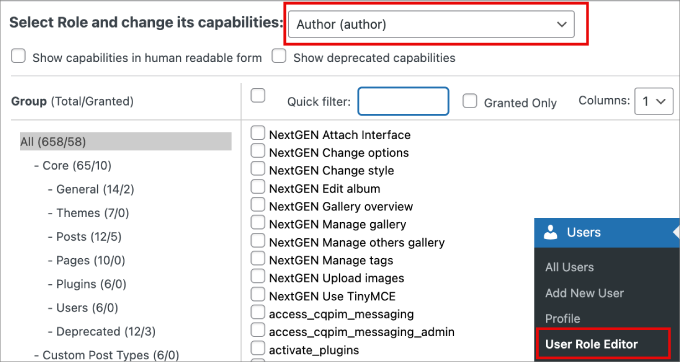
Then, using the ‘Quick filter’ option, look for ‘upload_files.’
Finally, just click the ‘Update’ button to make those changes.

This plugin also allows you to create new custom roles and give them access to permissions of your choosing.
5. Fix Featured Image Not Showing on a Blog Post Gallery Page
One of the best ways to use featured images is by showcasing your blog posts on your website’s homepage.
But what if the featured images don’t appear on the blog page?
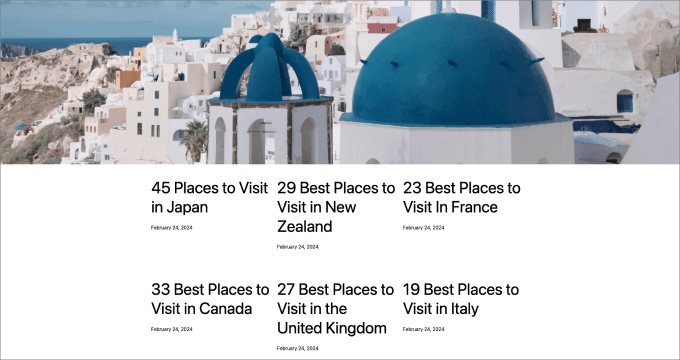
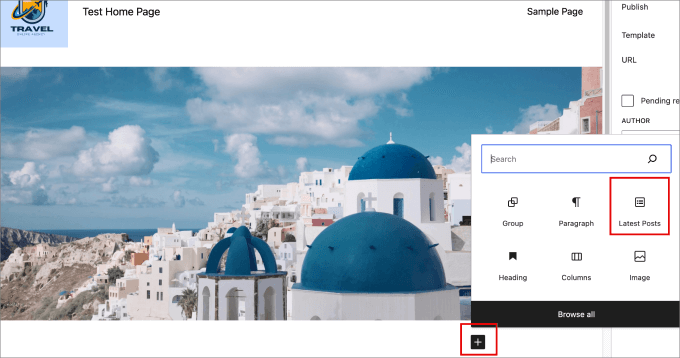
To fix this issue, go and edit your home page or any page that you’d like to have the featured images appear.
Click on the ‘+’ icon and add the ‘Latest Posts’ block to the post on the page. From here, you’ll see links to your recent posts appear.
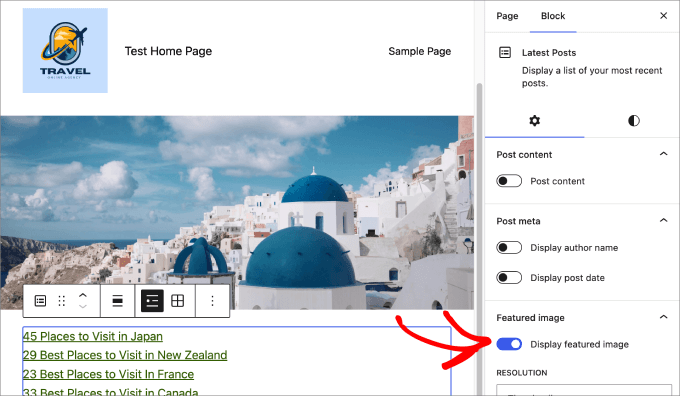
Click on the block and enable the ‘Display featured image’ option.
You can adjust the other settings, such as alignment and featured image size, to fit your page.
From here, your featured images should appear on your blog post gallery.
Here’s what it’ll look like once featured images show up.

6. Add Custom Code to Fix Featured Image Issues
Sometimes, post thumbnails aren’t clickable due to your current WordPress theme, which may not support that specific functionality.
Perhaps you want to add your featured images to RSS feeds or display the featured image in the list of posts in the admin area.
All of these things can be done with WPCode.
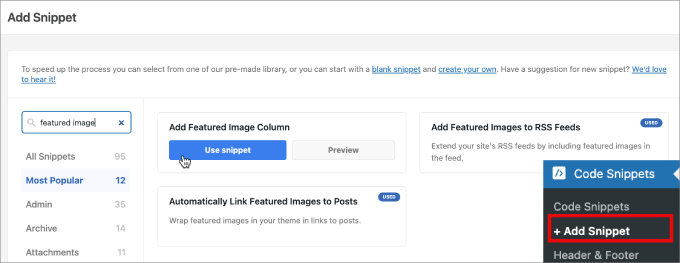
Upon activation, head over to Code Snippets » + Add Snippet. You’ll be sent to a library of pre-made custom code options.
Type’ featured image’ in the search bar so that you’ll see all the available custom code options for adding featured images to your website.
From here, just select your desired option.
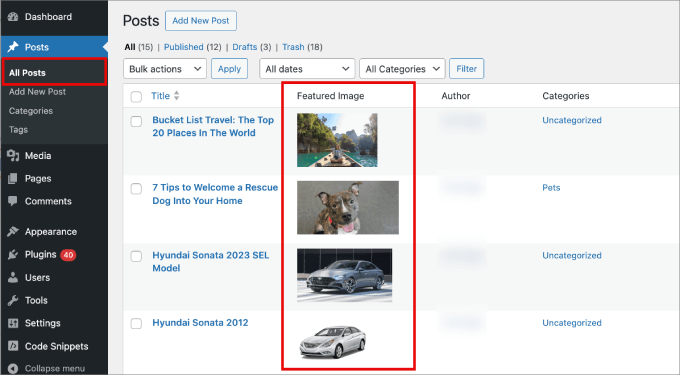
For example, let’s say we want to add featured image columns to our WordPress admin dashboard. Just hover over the option and select ‘ Use Snippet.’
You’ll be then taken to a page where you can edit the snippet.
That said, the code is already pre-set, so you don’t have to tinker with the code or settings.
But if you need to enter the code manually, you can copy and paste from below:
add_filter( 'manage_posts_columns', function ( $columns ) {
	// You can change this to any other position by changing 'title' to the name of the column you want to put it after.
	$move_after="title";
	$move_after_key = array_search( $move_after, array_keys( $columns ), true );

	$first_columns = array_slice( $columns, 0, $move_after_key + 1 );
	$last_columns  = array_slice( $columns, $move_after_key + 1 );

	return array_merge(
		$first_columns,
		array(
			'featured_image' => __( 'Featured Image' ),
		),
		$last_columns
	);
} );

add_action( 'manage_posts_custom_column', function ( $column ) {
	if ( 'featured_image' === $column ) {
		the_post_thumbnail( array( 300, 80 ) );
	}
} );
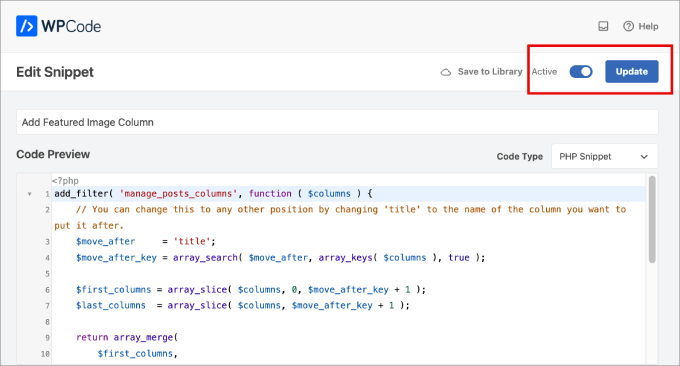
Then, simply toggle the button to turn on the custom code snippet, then hit ‘Update.’
Then, you can head over to the Posts » All Posts page in your admin.
You should see that the post thumbnails appear.
You may also want to read our post on how to automatically link featured images to posts in WordPress or our tutorial on how to add post thumbnails to your WordPress RSS feeds.
Fixing the WordPress Featured Image Not Showing Up in the Right Size
Sometimes, your WordPress-featured image might not show up in the right size. It’s best to understand the best practices for featured images so that you can avoid issues in the first place.
Choosing the Right Graphics for Featured Images
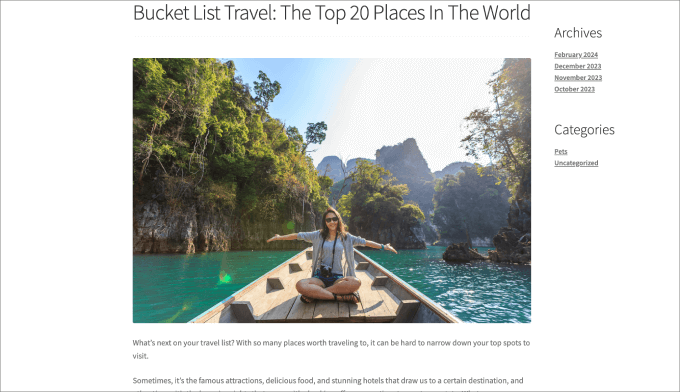
The optimal featured image size for rectangular featured images is 1200 x 687 pixels. However, for themes that use square feature images, the best size is 600 x 600 pixels.
For more details, read our guide on how to do basic image editing in WordPress.
Changing the Default Image Sizes in WordPress
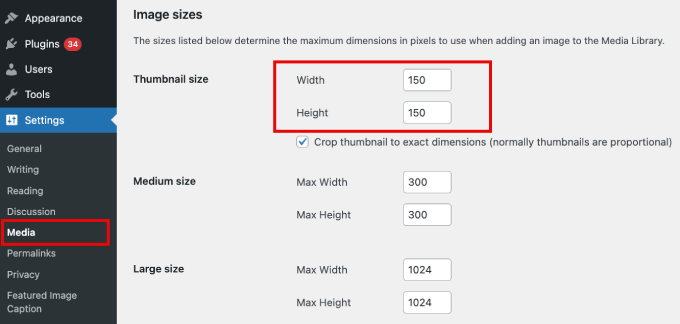
If the thumbnails in your blog appear way too small or big, you can manually edit the default image sizes.
WordPress will automatically create copies of your featured images to add them to different areas of your website, such as the blog page, archive pages, and homepage.
WordPress themes come with their own picture dimensions, but sometimes, you still might want to tinker with your featured image size.
Head over to Settings » Media from your WordPress admin area. Then, in the Thumbnail size fields, enter the new dimensions for your featured image.
For more details, check out our beginner’s guide to WordPress image sizes.
Featured Images Not Appearing On Facebook
Featured images are pulled from WordPress and are popular on social media platforms through the use of Open Graph.
It’s a technology that allows social media sites like Facebook to understand and display content from a website. Open Graph meta tags can be added to individual posts and pages to control how they appear when shared. These tags include information such as the title, description, and featured image of the content.
The easiest way to ensure that all featured images appear on Facebook is to use All in One SEO. It is the best WordPress SEO plugin that helps to improve and optimize your website for higher search rankings.
Once activated, head over to All in One SEO » Social Networks. Then, under the Facebook tab, make sure you enable the option ‘Enable Open Graph Markup.’
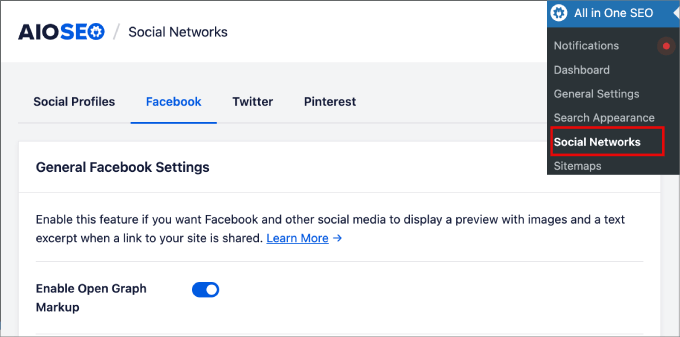
This automatically displays a preview of your blog posts with a featured image and a short text excerpt.
For more details, check out our guide on how to add Facebook open graph meta data in WordPress themes.
We hope that this article helped you fix the featured image not showing on WordPress. You may also want to check out our list of the most common WordPress errors and how to fix them, along with our guide on how to increase your blog traffic.
If you liked this article, then please subscribe to our YouTube Channel for WordPress video tutorials. You can also find us on Twitter and Facebook.
Leave A Comment
You must be logged in to post a comment.