Are you looking to use Git and integrate GitHub with your WordPress website?
Git and GitHub are essential tools for developers who want to keep track of changes in the code, manage different coding projects, and work with a team on the same code. You can also recover a stable version of your code in case something goes wrong during the development process.
In this article, we will explain everything about using Git with WordPress.
Here’s an overview of everything we will cover in this guide. You can click the links below to jump ahead to any section:
What is Git?
Git, short for global information tracker, is a distributed version control system that helps track changes in different computer files or coding projects. These projects are stored in what’s called a repository (or repo), which is essentially the parent folder Git uses for storing all of the files.
Git mainly used by developers working on different software development tasks. With Git, multiple people can simply make a clone of the main repository that contains the original code.
They can then make modifications on their own computer without having to access or edit the main repository. When they have made their changes and are ready to submit them, many users will upload them to a service like GitHub that helps organize teams’ various repositories.
Git vs GitHub – What’s the Difference?
When discussing git, one of the most-asked questions is what’s the difference between Git and GitHub.
Often, beginners and new site owners think Git and GitHub are the same thing. However, there is a difference between the two.
Git is the actual version control system that lets you track changes in your code and create and sort it into something called repositories. GitHub, then, is a web hosting platform for storing Git repositories for easy team access.
You can use Git independently, keeping everything organized on a local machine, but you cannot use GitHub without Git.
Besides that, there are many other Git hosting platforms, such as Launchpad, Assembla, and Bitbucket. But the most popular is GitHub, which offers additional features on top of Git.
GitHub is more suitable for companies and remote teams that have multiple people working on the same project. It’s a user-friendly interface and powerful features make it a great tool for collaborations.
Plus, it stores everything on the cloud so you don’t have to worry about losing your data in case your local machine gets damaged or stolen.
That said, let’s see some situations where you’d want to use Git and GitHub for WordPress development.
How to Use Git and GitHub for WordPress Development
The 2 main reasons for using Git and GitHub are for WordPress theme and plugin development.
For instance, if you’re creating a new theme or using a custom-built theme for your site, then GitHub is perfect for managing the codebase of your project.
You can simply fetch the theme repository from GitHub, make changes, and then test the theme on a local server. Once the changes are made, you can push the updated repo to GitHub and then apply changes to the theme on your live WordPress site.
Similarly, if you’re a WordPress developer who creates plugins, then you can use GitHub to manage the codebase.
It’s also great for open-source projects where anyone is welcome to contribute towards developing a WordPress plugin. For example, you can get the plugin files from GitHub to fix bugs or work on improving a feature.
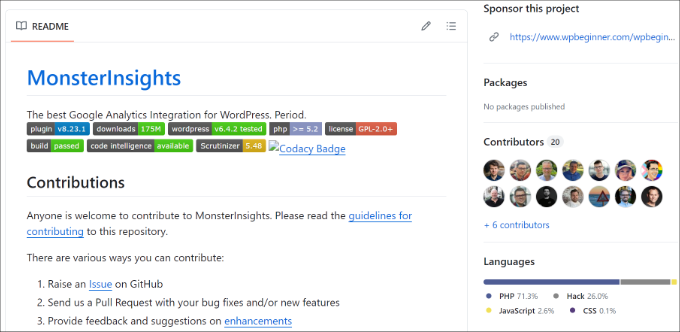
Aside from that, you can use GitHub and Git to download and install WordPress plugins and themes on your live website. While GitHub does allow file storage and downloading, it is not set up to be used as file storage in the same way Dropbox or Google Drive is.
Now, let’s see how you can use Git and GitHub both for WordPress development. For this tutorial, we will show you how to make changes to a local plugin file and upload it to GitHub.
Setting Up a Local WordPress Environment for Git
Before using Git and GitHub, it’s a best practice to create a local WordPress environment. This is where you can work on your project, make changes to a WordPress site, try your new code, and test plugin and theme development.
Having a local environment ensures that your live website is not affected by the changes until you deploy them. In case anything goes wrong, you can make changes and debug the code on your local website.
To get started, you can use local web software that lets you host local sites on your computer instead of a staging or live server.
For example, software like Local WP (previously known as Local by Flywheel), MAMP, XAMPP, and WampServer are great for creating local environments. They’re free to use and very easy to set up.
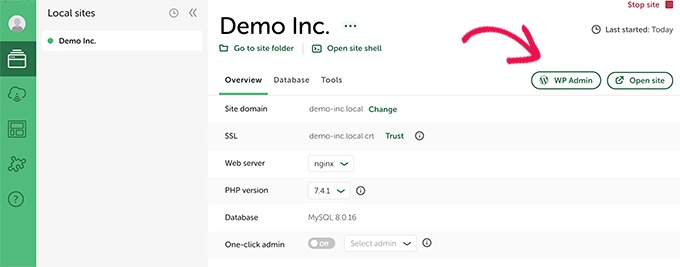
You can learn more by following our guides on how to install WordPress on a Windows computer and how to install WordPress locally on a Mac.
Installing Git Locally and Creating a Repository
Once your local environment is ready, the next step is to download and install Git on your computer.
But before you do that, it’s important to check whether Git is already installed on your machine or not. That’s because the latest macOS and Linux devices have Git pre-installed.
To start, simply enter the git -version command in the ‘Terminal’ on any Mac or Linux machine. On a Windows device, you can open the Command Prompt and type the git version command.
If Git is pre-installed, then you should see Git’s version number. If it’s not already installed, then you will see nothing or get an unknown command error. This means you’ll have to install Git on your machine.
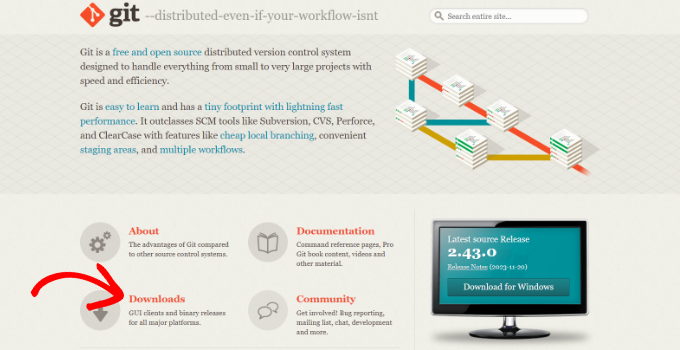
First, you’ll need to visit the Git website and head to the ‘Downloads’ section.
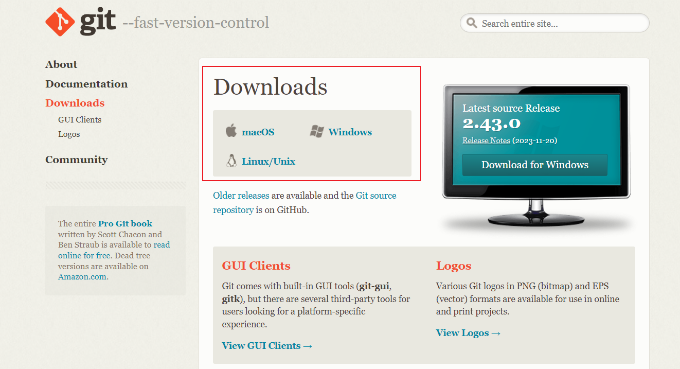
On the next screen, you will find links for Mac, Windows, and Linux/Unix.
Go ahead and click on the link for your device’s operating system to download Git.
After downloading Git from the website, you can launch the installation wizard.
From here, click the ‘Next’ button and simply follow the onscreen instructions to complete the installation process.
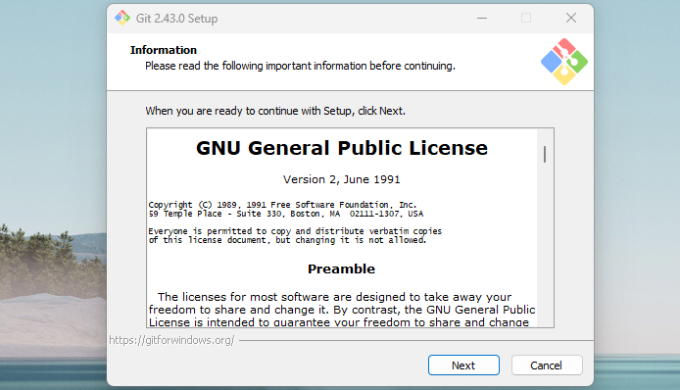
Once the installation is complete, you can launch Git.
After that, simply type git version to verify that the software is installed correctly.

Now that Git is ready to use on your system, the next step is to create a local Git repository where you can commit changes to your WordPress site files before pushing them to GitHub.
To start, navigate to the local website files on your computer. From here, locate the ‘wp-content’ folder and then go to the plugins folder. Now right-click anywhere inside the folder and click the ‘Open Git Bash Here’ option.
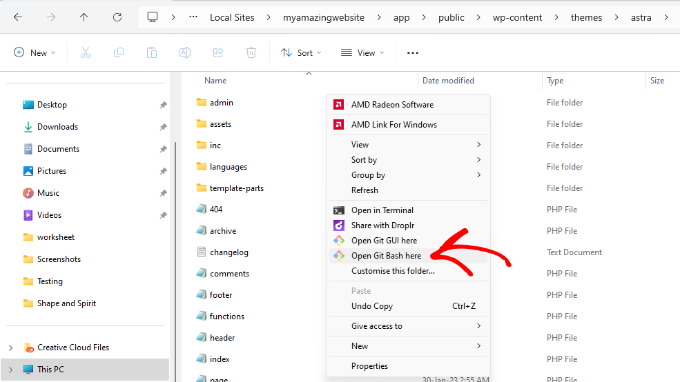
This will open the Git software on your computer.
From here, simply type the following command and hit the Enter or Return key on your keyboard.

After that, you will need to type the following command to stage file changes.
Once that’s done, hit Enter or Return.

Next, you can add a message to your repo by typing the following command.
git commit -m “message”
Don’t forget to replace the message with any text you like. This is a way of leaving notes regarding the specific changes you have made in the repo.

Once that’s done, simply hit the Enter or Return button from your keyboard.
You should now see a hidden ‘.git’ folder in your local WordPress theme files.
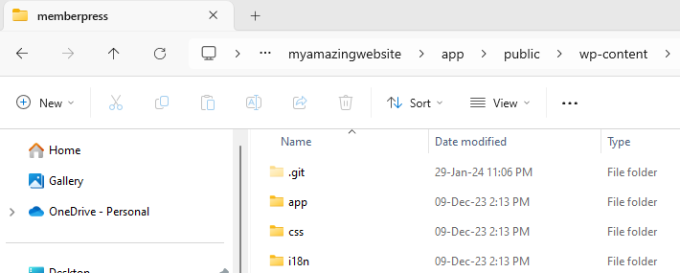
Creating GitHub Repository and Commit Changes
Next, you can head to the GitHub website and sign up for a free account.
To start, simply enter your email address and click the ‘Sign up for GitHub’ button.

On the next screen, you will need to enter details to create a new account.
For instance, create a password, enter a username, and check your email preferences.
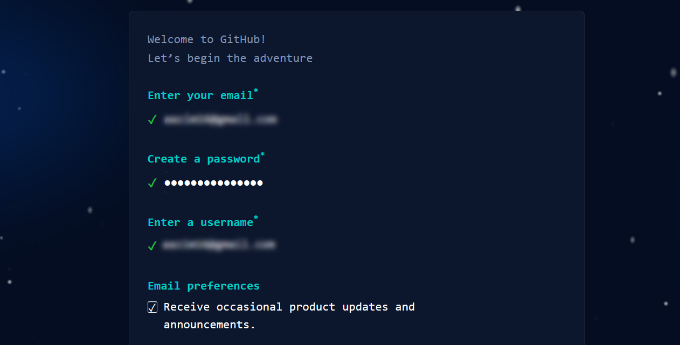
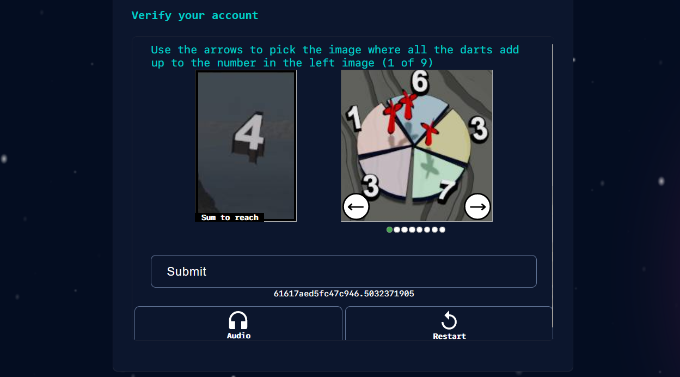
If you scroll down, then GitHub will ask you to solve a puzzle to verify your account.
It’s similar to having reCAPTCHA on your site.
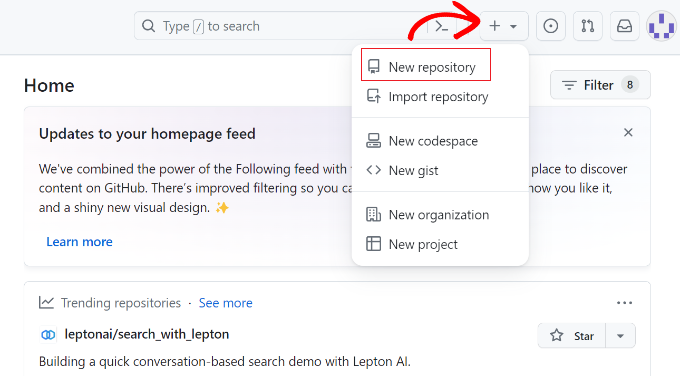
Once your account is ready, you will see the GitHub dashboard.
Go ahead and click the ‘+’ sign at the top and select the ‘New repository’ optin.
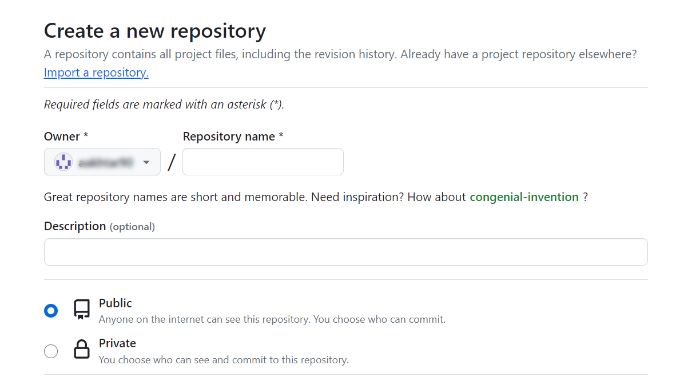
After that, you can enter a name for your repository.
There are also options to add a description and make the repository public or keep it private.
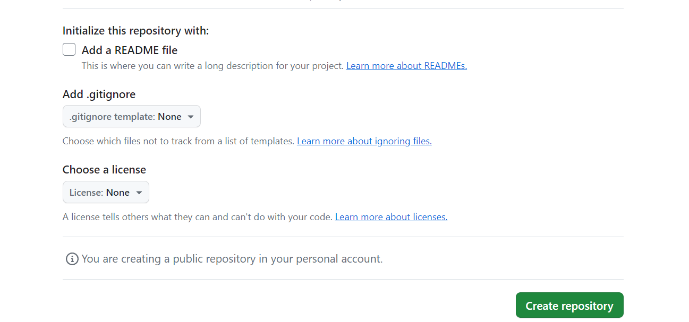
If you scroll down, then you’ll see more options, like adding a README file and choosing a license.
Once you’ve entered all the details, click the ‘Create repository’ button.
After creating the repository, you’ll need to copy its URL.
You can find the link under the Quick Setup section.
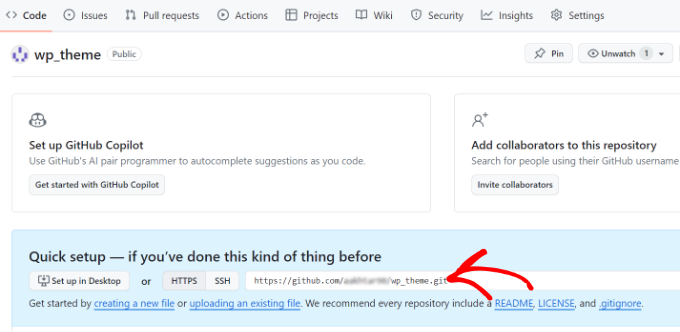
Next, you will need to open Git Bash on your computer.
From here, simply enter the following command and press Enter or Return.
git remote add origin URL
Don’t forget to replace the URL with your repository’s link.

After that, you can type the following command.
This will send the local repository to the remote repository on GitHub.
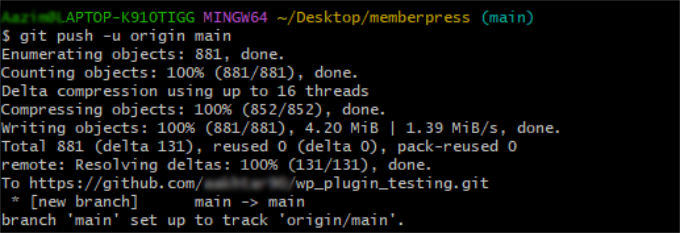
Next, you may be asked to connect your GitHub account if it is not already connected with Git. Simply sign in to your account and authorize Git to connect.
Now, you can open the GitHub repository and see the local files you just edited.
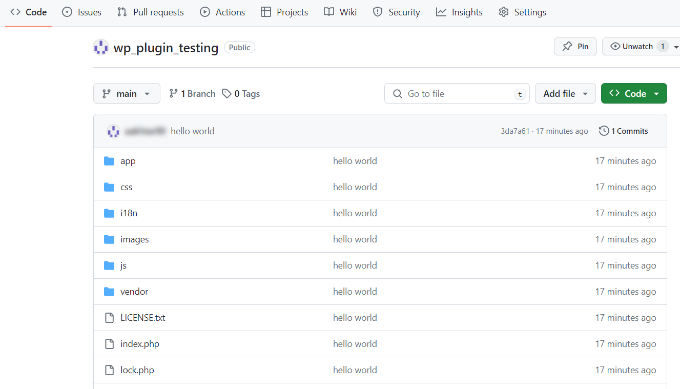
After pushing the local files to GitHub, other users can edit the file and make further changes to the plugin or theme.
If you need to fetch these updates from a GitHub repository for your local website setup, then you’ll need to open the plugin folder on your computer, right-click anywhere, and open Git Bash.
Next, you can type the following command and press the Enter or Return key.
Don’t forget to replace the URL with the link to the GitHub repository.
You can now repeat these steps to start WordPress development using Git and GitHub.
Once you’ve made the changes to the local files, the next step is to push them to the live site.
Deploy GitHub Themes and Plugins to a Live WordPress Site
After you’ve completed developing a WordPress plugin or theme, the last step is to deploy it on your live website.
Now, you can use Git and run different commands to push your changes to the WordPress website. However, there is an easier way by using a WordPress Github plugin like WP Pusher.
First, you’ll need to visit the WP Pusher website and click the ‘Download’ button.
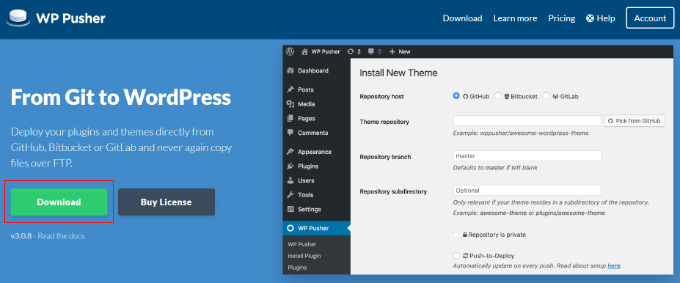
Next, download the WP Pusher plugin files and save them on your computer.
After that, go ahead and install and activate the WP Pusher plugin. If you need help, then please see our guide on how to install a WordPress plugin.
Upon activation, you can head to WP Pusher from the WordPress dashboard and switch to the ‘GitHub’ tab.
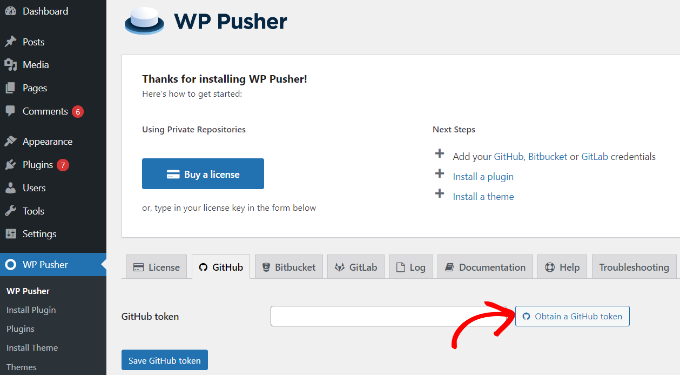
Next, a new popup window will open, asking you to allow WP Pusher to connect with your GitHub account.
Simply click the ‘Authorize wppusher’ button to continue.
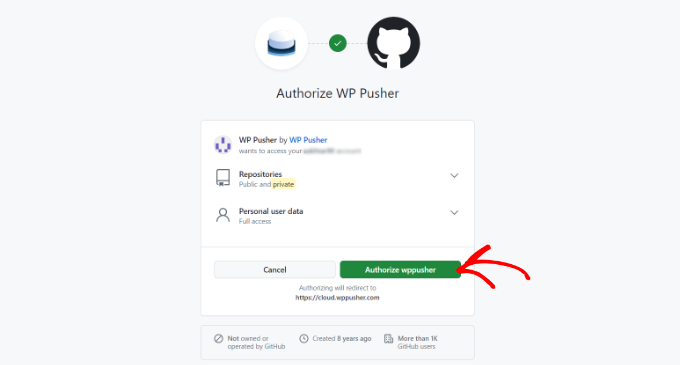
From here, you’ll need to login to your GitHub account.
Once that’s done, simply copy the GitHub token on the next screen.

Now, go to WP Pusher GitHub settings and then enter the token code.
Don’t forget to click the ‘Save GitHub token’ button.
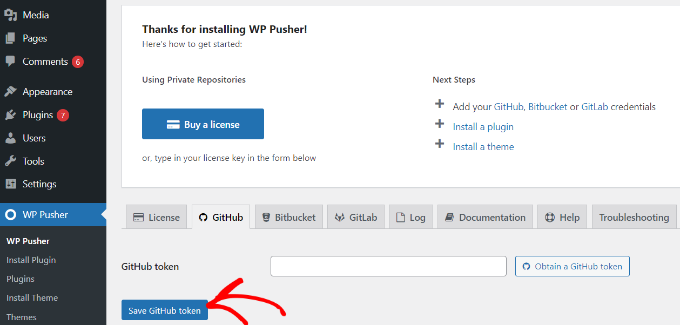
Once GitHub is connected, you can install any themes or plugins that you’ve uploaded to GitHub from the repository onto your live WordPress website.
For example, head to WP Pusher » Install Plugin in the WordPress admin panel and enter the plugin repository URL.
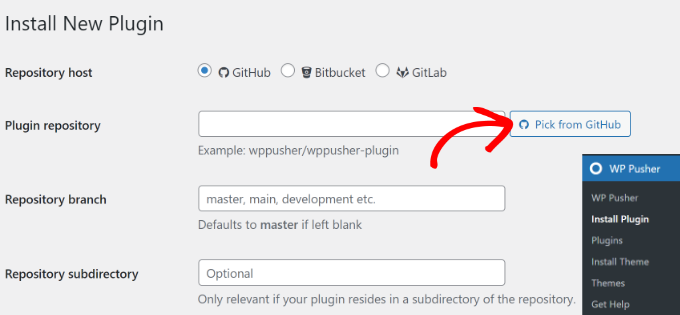
Or you can click the ‘Pick from GitHub’ button, and a new popup window will open.
From here, simply copy the link to your plugin repository.
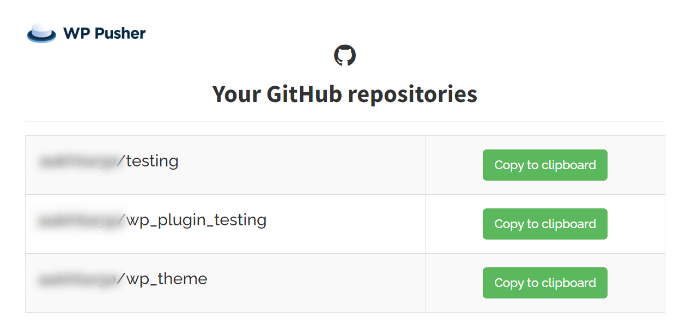
After entering the GitHub repo URL, you can enter other details like repository branch and subdirectory.
Next, you’ll need to scroll down and click the ‘Install plugin’ button at the bottom.
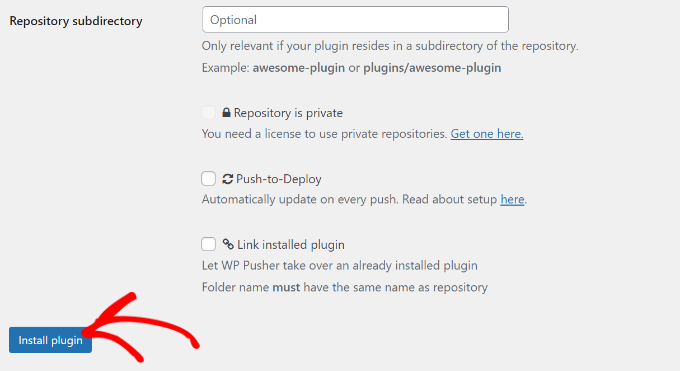
Once the plugin installs, you’ll need to activate it.
To do that, simply go to Plugins » Installed Plugins and navigate to the plugin you just installed. From here, you can click the ‘Activate’ button.
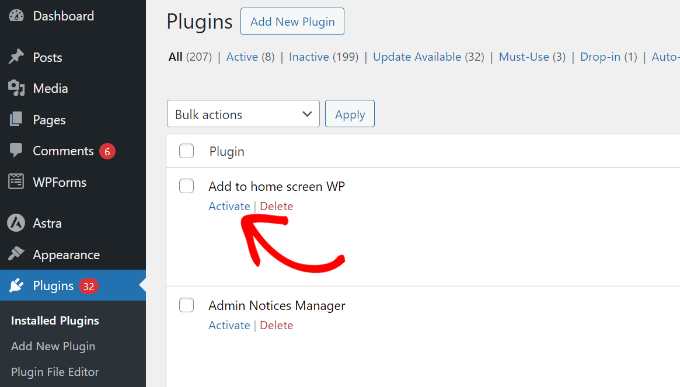
You can now start using the installed plugin on your website.
Similarly, you can head to Install Theme under WP Pusher in your WordPress dashboard to set up a custom theme you’ve developed using this same process.
Install WordPress Plugins and Themes from GitHub
Apart from integrating WordPress with Git and GitHub for development, you can also get plugin and theme files that are no longer available in the WordPress.org library.
WordPress developers usually create GitHub repositories for their plugins and themes. You can often easily find them on GitHub if they’re unavailable in WordPress’s plugin and theme library.
Simply open GitHub and search for the plugin or theme you want to install. After that, you can click the ‘Code’ button and select the ‘Download ZIP’ option.
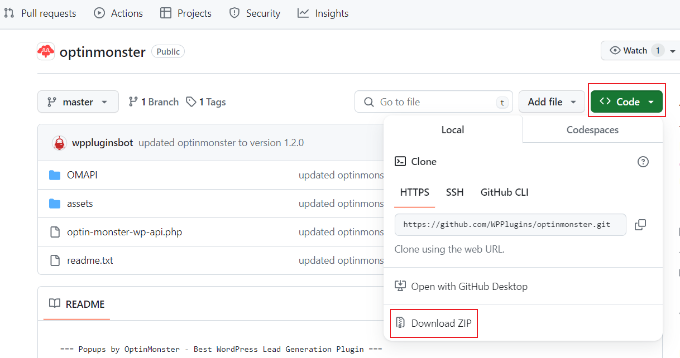
This way, you can download the plugin files and install them on your website.
For more details, please see our guide on how to install WordPress plugins and themes from GitHub.
Important Git and GitHub Terms You Should Know
You’ll come across different Git and GitHub terminologies as you start to use them for WordPress development and other purposes. To help you out, here are some important terms you should know:
- Branches – A branch is like a parallel repository that you can create. It lets you make changes and work freely without affecting the main branch or disrupting the live version.
- Merge – When you want to take changes from one branch and apply them to another branch, then this process is called merging. However, the branches need to be in the same repository or from a fork.
- Pull – It refers to fetching changes and merging them. Let’s say someone made changes to a file in the repository. You can pull those changes to your local environment to ensure your files are up to date.
- Pull Requests (PR) – A pull request is when a user submits proposed changes to a repository, and it is accepted or rejected by another repository collaborator.
- Fork – A fork is a personal copy of another user’s repository that you have on your account. You can make changes to a project freely using a fork without affecting the original repository.
- Commit – A commit is an individual change to a file in the repository. When you make a commit, Git will create a unique ID to help you keep a record of specific changes. It also records who made the changes and when they were made.
- Push – Pushing means sending your changes to a remote repository on GitHub. For instance, if you make changes to a file locally, then you can push them so others can also access them.
We hope this article helped you learn how to use Git with WordPress. You may also want to see our guide on WordPress SEO and the most common WordPress errors and how to fix them.
If you liked this article, then please subscribe to our YouTube Channel for WordPress video tutorials. You can also find us on Twitter and Facebook.
If you liked this article, then please subscribe to our YouTube Channel for WordPress video tutorials. You can also find us on Twitter and Facebook.
Leave A Comment
You must be logged in to post a comment.