Do you receive constant WordPress admin notifications from your plugins and themes?
Wouldn’t it be nice if you could take these notices and place them in a convenient, out-of-the-way dropdown menu at the top of the screen?
In this article, we will show you how to add a notification center in WordPress.
Why Add a Notification Center in WordPress?
On your WordPress website, you will see notifications from plugin and theme authors in the admin area of your site. If you have a lot of plugins, these admin notices can get out of control and sometimes cover half the screen.
Notification overload isn’t just a problem with WordPress. That’s why smartphone developers work hard to make it easy to manage notifications with a lock screen or swipe gestures.
Facebook does something similar by providing a dropdown notification area where you can see and manage notifications for specific people or pages.
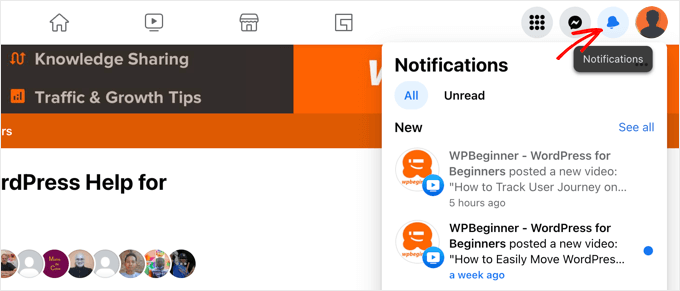
You can do this on your WordPress blog, too, by adding a notification center to your admin toolbar.
With that being said, let’s take a look at how to add a notification center in WordPress.
How to Add a Notification Center in WordPress
The first thing you need to do is install and activate the Admin Notices Manager plugin. For more details, see our step-by-step guide on how to install a WordPress plugin.
Upon activation, the plugin will start to capture all new notifications. You don’t need to adjust any settings for it to begin working.
Admin notices will be moved out of the WordPress dashboard and displayed in one central location on the WordPress toolbar next to your username in the top bar, right beside the ‘Howdy Admin’ greeting.
To begin with, there will be no new notifications to display. Instead, the plugin will show a message that lets you know where the new notifications will be displayed.
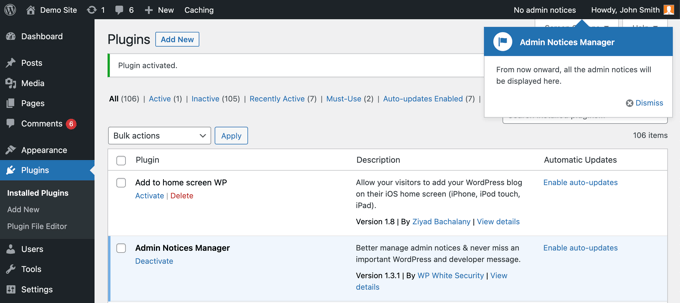
Once there are some notifications, the number of new notices will be highlighted on your admin toolbar.
When you click on the ‘Admin notices’ link at the top of the screen, a panel that lists each admin notice will appear below it.
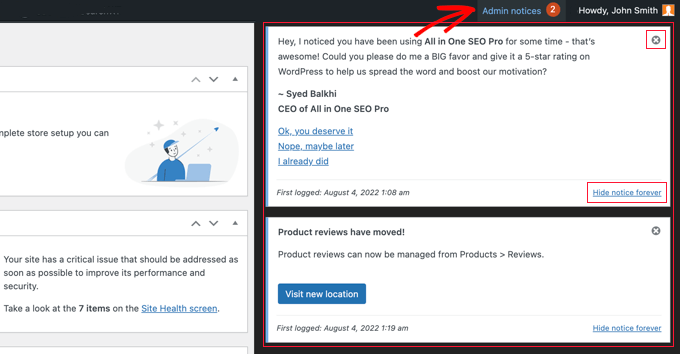
You can interact with a notification directly, clicking buttons or links right from the notification center.
When you’ve finished with a notification, you can dismiss it by clicking the ‘X’ icon in the top right corner. Or if you never wish to see that specific notification again, simply click the ‘Hide notice forever’ link at the bottom.
Adjusting Admin Notices Settings
Simply head over to the Settings » Admin Notices page to configure the plugin.
From here, you get to choose which types of admin notices appear in your new notification center. You can also select some to show up in the WordPress dashboard as usual, or you can hide them completely.
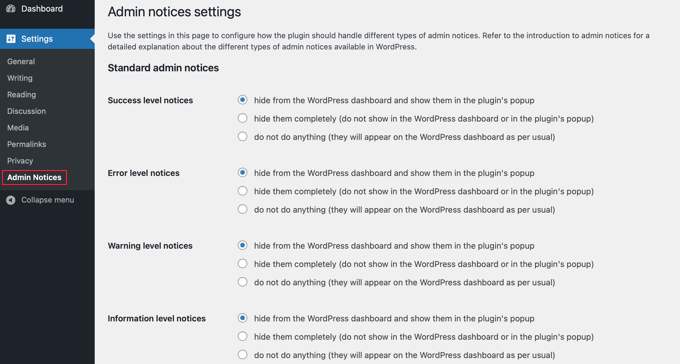
Here you will find settings for each type of standard admin notice:
- Green success notices about changes made to your site, such as a changed setting
- Red error notices that appear when something has gone wrong with your site
- Yellow warning notices that let you know that something requires your attention
- Blue information notices that display simple information
Near the bottom of the page, you can customize the way notifications are hidden and whether the notification center slides in from the side or is displayed as a popup.
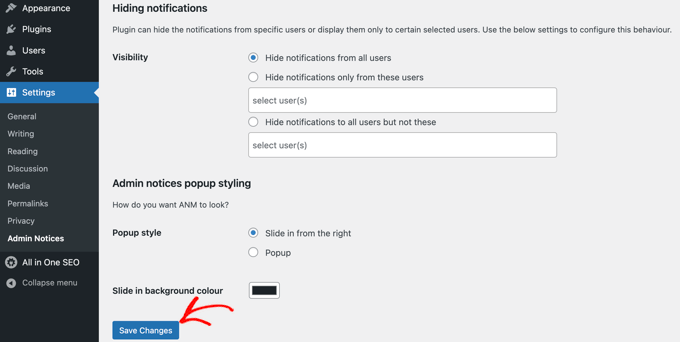
When you are happy with your settings, make sure you scroll to the bottom of the page and click the ‘Save Changes’ button to store your settings.
Your WordPress notification center is now set up, and all of your messages will start appearing in the top admin bar immediately.
We hope this tutorial helped you learn how to add a notification center in WordPress. You may also want to learn how to create a free business email address, or check out our list of important reasons why you should use WordPress for your website.
If you liked this article, then please subscribe to our YouTube Channel for WordPress video tutorials. You can also find us on Twitter and Facebook.
Leave A Comment
You must be logged in to post a comment.