Are you looking to improve user engagement on your website?
Having reaction buttons on your WordPress site gives your readers a simple and easy way to leave feedback on your blog without having to type a comment.
In this article, we will show you how to add reaction buttons in WordPress.
Why Add Reaction Buttons in WordPress?
Reaction buttons help you boost user engagement on your WordPress blog. because not all users have the time or confidence to leave a comment.
That’s why popular social media websites like Facebook use Like and other Reaction buttons to boost engagement. You can also add a Facebook Like button to your posts.
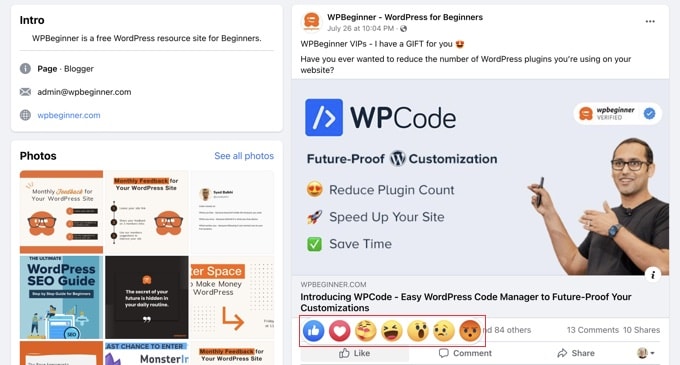
You can encourage more interaction on your site by adding WordPress reaction buttons. These allow your users to engage with your post with just a click.
With that being said, let’s take a look at how to add this kind of reaction button to your WordPress site.
How to Add Reaction Buttons in WordPress
The first thing you need to do is install and activate the WP Reactions Lite plugin. For more details, see our step-by-step guide on how to install a WordPress plugin.
For this tutorial, we’ll use the free version of the plugin. There is also a premium version, WP Reactions, which adds additional features such as buttons for more social platforms.
Upon activation, head over to WP Reactions » Global Activation to configure the plugin. Once there, you need to toggle the ‘Reactions’ switch to the ON position.
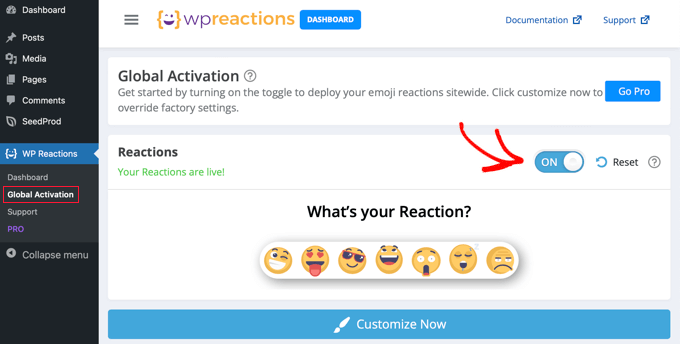
WordPress reaction buttons will now be displayed at the bottom of each post and page. You can customize various reaction options by clicking the ‘Customize Now’ button and using the WP Reactions setup wizard.
Customizing Your WordPress Reaction Buttons
The default settings of the WP Reactions plugin will work for most WordPress websites. However, there are still many ways to customize them to suit your needs.
First, you will see the 7 default emojis at the bottom of the screen. You can rearrange or replace the emojis by dragging and dropping them. When an emoji is highlighted blue, that means it’s already included.
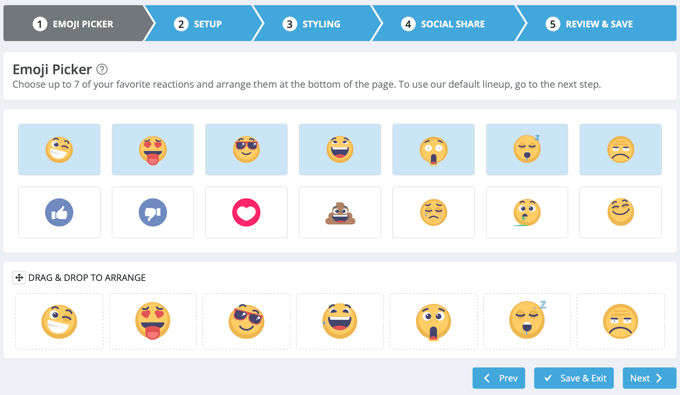
When you are happy with your reaction button selection, click the ‘Next’ button at the bottom.
On the next page, you can choose the size of the emojis and whether to animate them. You can also choose the color of the badges that show how many times users have clicked on each reaction.
Pro users can disable these badges altogether.
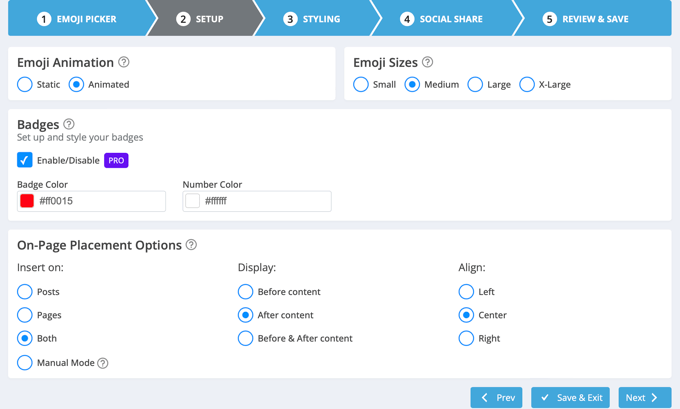
Now you can decide where to place the reaction buttons using the settings at the bottom of the screen. They can appear on posts, pages, or both, and you can display them before or after the content. You can also select if they will be left-, center-, or right-aligned.
When you are happy with your selections, just click the ‘Next’ button.
You can now choose the styling for the call to action (CTA), background, and border. By default, the words ‘What’s your Reaction?’ will appear above the buttons. You can change or hide this text, as well as adjust the font options.
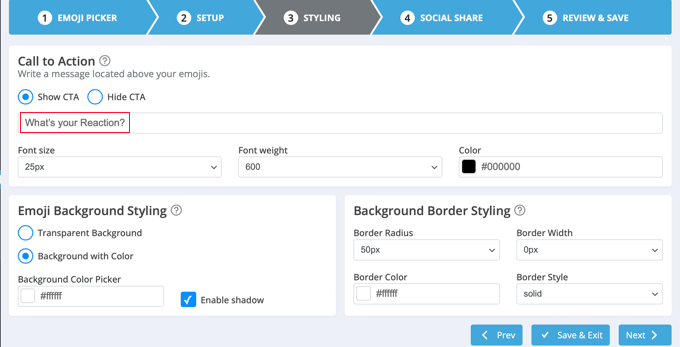
You can click the ‘Next’ button when you’re finished.
On the following page, you will configure the optional social share buttons. There are options to show buttons for Facebook, Twitter, Email, and Telegram. Pro users have even more options like LinkedIn and WhatsApp.
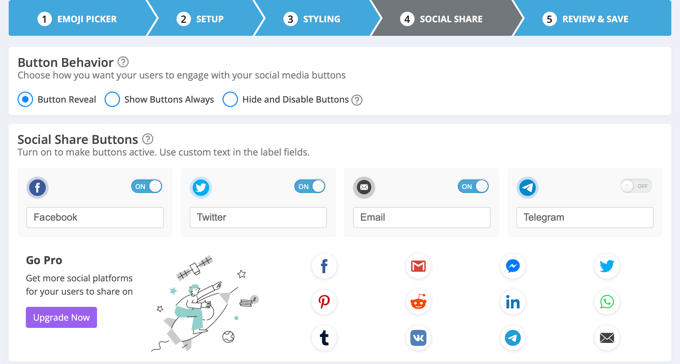
By default, the plugin will show these social share buttons after the user clicks a reaction button. You can change or disable this setting under the ‘Button Behavior’ section.
As you scroll down the page, you will find options to customize the size and color of the social share buttons. Make sure you press the ‘Next’ button when you are ready.
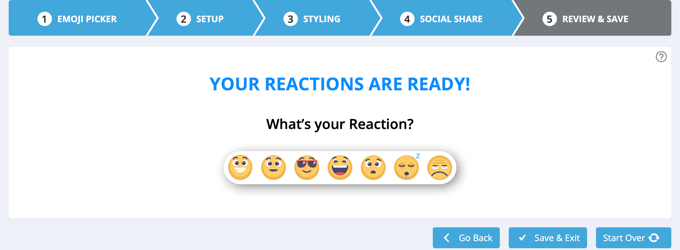
Congratulations, you have now successfully configured your WordPress reaction buttons. Make sure you click the ‘Save & Exit’ button to store your settings.
Previewing Your WordPress Reaction Buttons
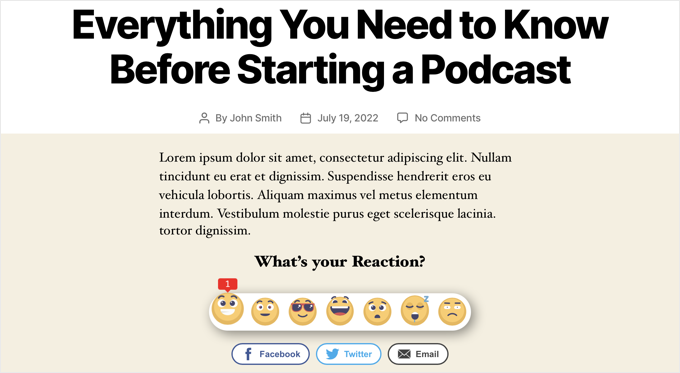
You can now visit any post on your website to see the reaction buttons in action. This is how it looks on our demo website using the default settings.
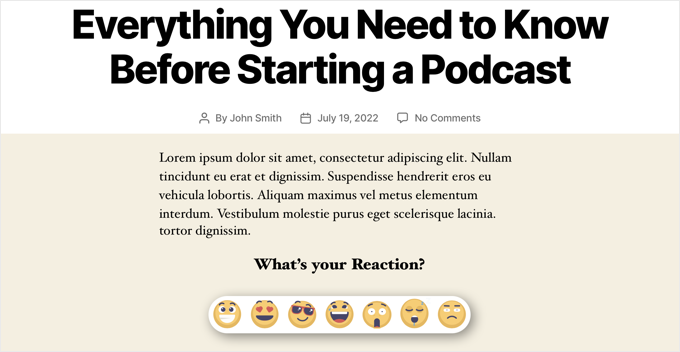
When you click one of the reaction buttons, its badge will be updated with a new total.
Notice that since we clicked an emoji, the social share buttons are now displayed under the WordPress reaction buttons.
We hope this tutorial helped you learn how to add WordPress reaction buttons to boost engagement on your site. You may also want to learn how to add keywords and meta descriptions or check out our list of the best social media plugins for WordPress.
If you liked this article, then please subscribe to our YouTube Channel for WordPress video tutorials. You can also find us on Twitter and Facebook.
The post How to Add WordPress Reaction Buttons to Boost Engagement first appeared on WPBeginner.
Leave A Comment
You must be logged in to post a comment.