Do you want to display ad blocks in specific posts on your WordPress website?
Inserting ad blocks into a specific post allows you to showcase ads where your users will be highly engaged with the content. This increases ad visibility and helps you get more clicks.
In this article, we will show you how to easily display ad blocks in specific WordPress posts.
Why Display Ads in Specific WordPress Posts?
When visiting a WordPress website, you will often see banner ads in the sidebar or beneath the header. Since those are very common ad spots, they can lead to banner blindness, where users won’t notice the ads. In turn, this can affect the click rate.
By displaying ad blocks in specific WordPress posts, you can increase the visibility of your ads and target users who are most engaged with your content.
Not only does this help prevent ad fatigue by spreading out ads across multiple pages on your WordPress blog, but it also allows you to segment your audience. By showing targeted ads to users who are more likely to be interested in them, you improve your chances of engagement and clicks.
For example, a user who is reading one of your travel blog posts is more likely to be interested in an ad for travel gear or flights and may click on it to check out the prices.
Having said that, let’s see how to easily display ads in specific WordPress posts. You can use the quick links below to jump to the method you wish to use:
Method 1: Display Ad Blocks in Specific WordPress Posts Using WPCode (Recommended)
The easiest way to display ad blocks in specific WordPress posts is by using the WPCode plugin.
It is the best WordPress code snippets plugin on the market that makes it super easy to place ads within any page, post, or widget area on your WordPress website.
With WPCode, you can show advertisements from third-party platforms like Google AdSense or your own hosted ads.
First, you will need to install and activate the WPCode plugin. For more detailed instructions, please see our beginners’ guide on how to install a WordPress plugin.
Note: You can also use the free WPCode plugin for this tutorial. However, upgrading to the Pro version will give you access to a cloud library of code snippets, smart conditional logic, and more.
Upon activation, head over to the Code Snippets » + Add Snippet page in the WordPress admin sidebar.
From here, you need to click on the ‘Use Snippet’ button under the ‘Add Your Custom Code (New Snippet)’ option.

This will take you to the ‘Create Custom Snippet’ page, where you can start by typing a name for your code snippet. The code snippet title is only for your reference and won’t be shown to users on the website’s front end.
After that, you need to select ‘HTML Snippet’ as the Code Type from the right dropdown menu.
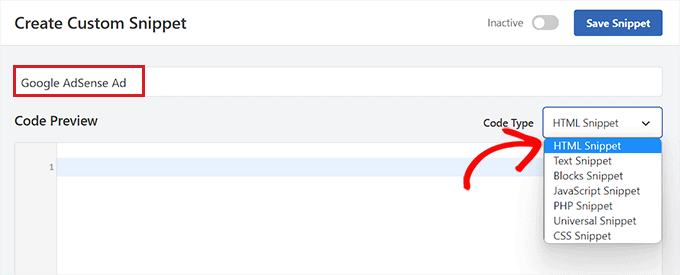
Next, you need to choose the type of ad you want to place on your site.
If you are using the ad code provided by Google AdSense, then you may want to see our guide on how to optimize your AdSense revenue in WordPress.
However, if you are creating your own ad, then you will need to get the code from the person who is paying you to show the ad on your site or write your own code.
Upon getting your ad code, simply copy and paste it into the ‘Code Preview’ box.
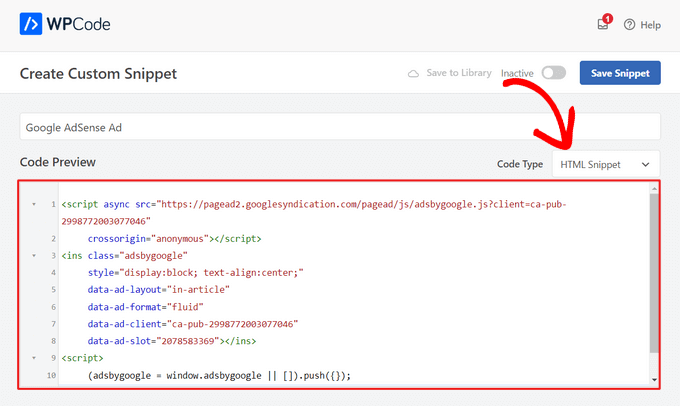
Once you have done that, you must scroll down to the ‘Insertion’ section and choose the ‘Auto Insert’ mode.
The ad will automatically be displayed in the specific post you choose.

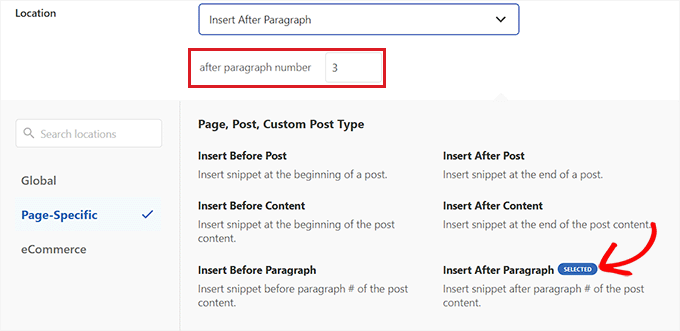
Next, click on the ‘Location’ dropdown menu to expand it, and then select the ‘Page-Specific’ tab from the left sidebar.
From here, choose the ‘Insert After Paragraph’ option.
You can also modify the number of paragraphs after which you want to insert the snippet.
For example, if you want to display the ad block after the 3rd paragraph, then you can type this value into the ‘after paragraph number’ box.
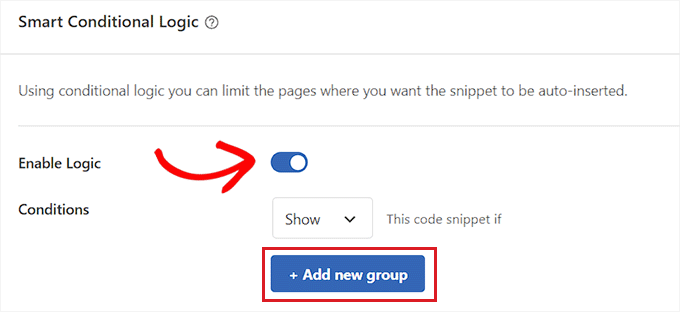
Next, scroll down to the ‘Smart Conditional Logic’ section and toggle the ‘Enable Logic’ switch to Active.
After that, make sure that the ‘Show’ option is selected for the code snippet condition. Once you have done that, just click the ‘+ Add new group’ button.
This will open up some new settings in the ‘Smart Conditional Logic’ section.
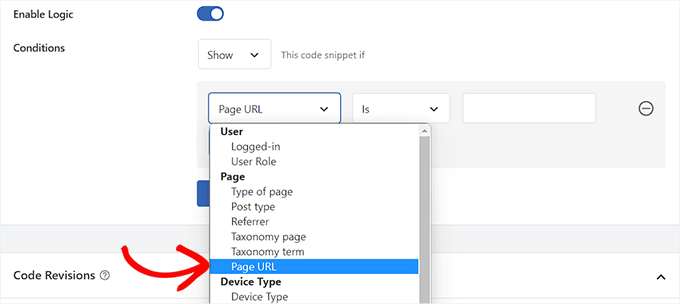
From here, you need to select the ‘Page URL’ option from the dropdown menu on the left.
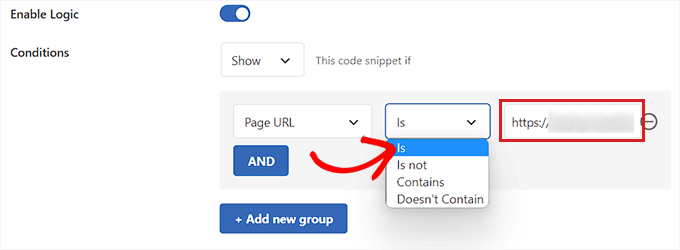
After that, you must select the ‘Is’ option from the dropdown menu in the middle.
Next, add the URL of the specific post where you want to display the ad block into the empty field in the right corner of the screen.
If you want to display this ad on more than one page or post, just click ‘AND’ and then follow the same process to insert the other post URL.
Once you have created this conditional logic, your ad block will only be displayed in that specific WordPress post.
Now, scroll back to the top and toggle the ‘Inactive’ switch to ‘Active’.
Finally, click the ‘Save Snippet’ button to execute the ad code on your website automatically.

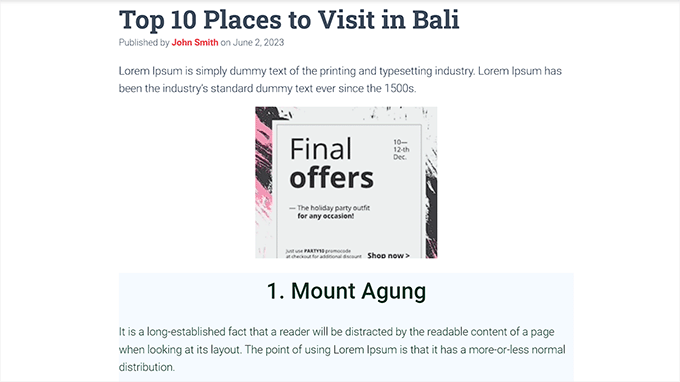
Now, you can visit the specific post you chose to see the ad block in action.
This is what it looked like on our demo website.
Method 2: Display Ad Blocks in WordPress Posts Using AdSanity
If you don’t want to use code on your website, then this method is for you.
AdSanity is a premium WordPress ad management plugin that allows you to easily create ad blocks and display them anywhere on your WordPress site. It works with any third-party ad network, including Google AdSense.
First, you need to install and activate the AdSanity plugin. For more details, please see our step-by-step guide on how to install a WordPress plugin.
Upon activation, you need to head to the Adsanity » Create Ad page from the WordPress admin sidebar.
From here, you can start by typing a name for the ad that you are creating.
Next, you must switch to the ‘Ad Hosted On-Site’ tab at the top if you are creating your own hosted ad.
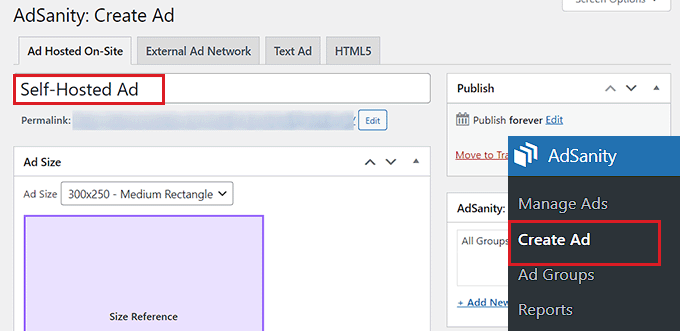
However, if you are displaying an ad from a third-party platform, then go to the ‘External Ad Network’ tab. Similarly, if you want to upload an HTML file for your ad, then you must switch to the ‘HTML5’ tab.
For this tutorial, we will be displaying a self-hosted ad in a specific WordPress post, but the steps will be the same for other types of ads.
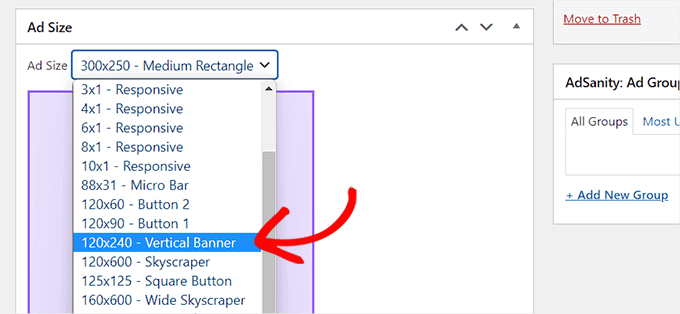
Once you have entered a name for your ad, select its size from the dropdown menu. This will be the banner size of the ad in your post.
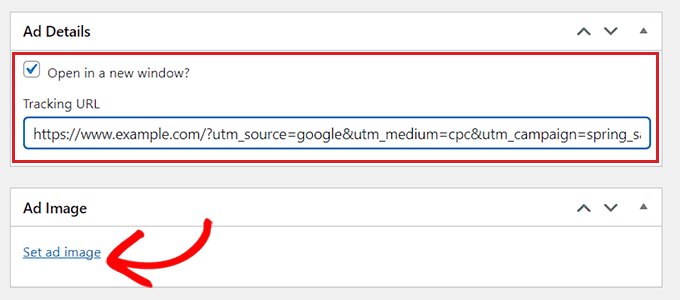
After that, you need to scroll down to the ‘Ad Details’ section and copy and paste the tracking URL of the ad you want to display.
Once you have done that, check the ‘Open in a new window?’ option if you want the ad to open up in a different window when a user clicks on it.
You can also set an image for your ad by clicking on the ‘Set ad image’ link. This will open up the WordPress media library, where you can upload an image.
Finally, click the ‘Publish’ button at the top to save your changes.
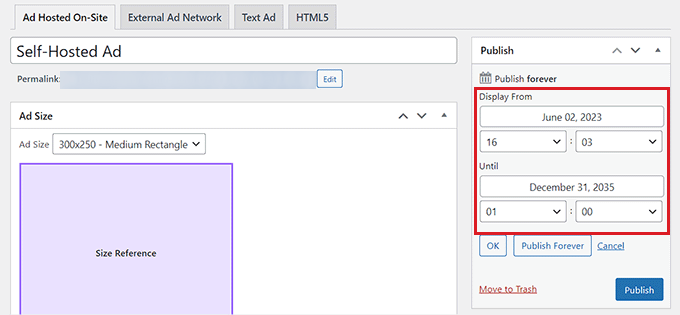
You can also click on the ‘Edit’ link in the ‘Publish’ section to set a start date and an expiration date for the ad.
Once you have clicked on the ‘Publish’ button, you can display the ad block on any page or post on your WordPress website.
Display the Ad in a Specific WordPress Post
First, you will need to open an existing or new WordPress post where you want to display the ad you created.
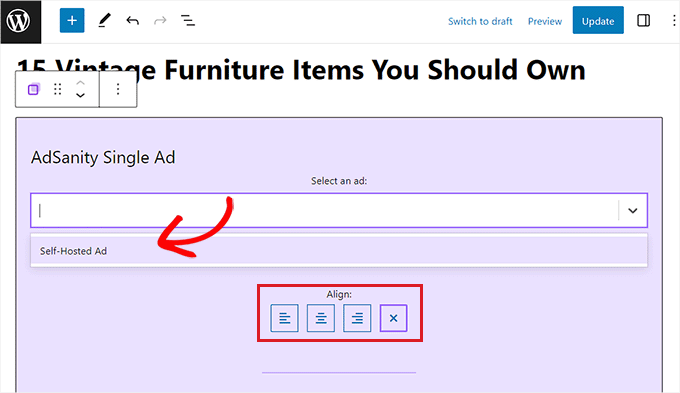
Once you are there, click the ‘+’ button in the top left corner of the screen to open up the block menu. Next, you need to look for and add the AdSanity Single Ad block to the WordPress post.
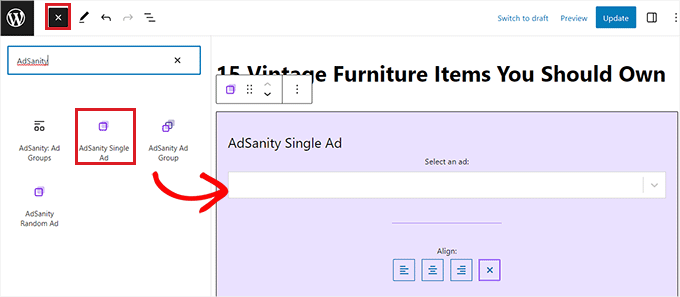
After that, select the ad that you want to display from the dropdown menu in the block.
You can also choose an alignment option for the ad block.
Finally, click the ‘Update’ or ‘Publish’ button at the top to save your changes.
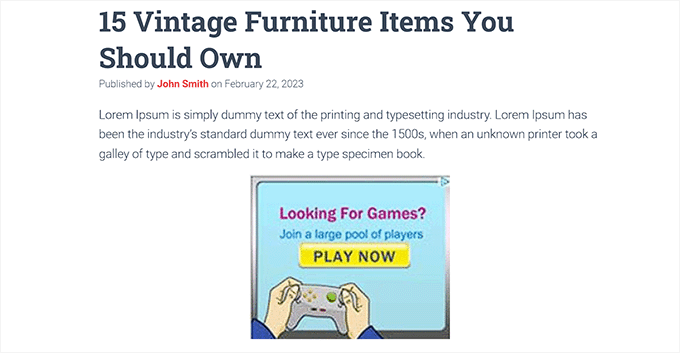
Now, you can visit your website to check out the ad block in action.
We hope this article helped you learn how to display ad blocks in specific WordPress posts. You may also want to see our tutorial on how to sell ads on your WordPress blog and our expert picks for the best affiliate marketing tool and plugins for WordPress to make money online.
If you liked this article, then please subscribe to our YouTube Channel for WordPress video tutorials. You can also find us on Twitter and Facebook.
Leave A Comment
You must be logged in to post a comment.