Do you want to learn how to display post meta data in your WordPress blog posts?
Meta data includes important information about your posts, such as the publication date, the author’s name, and the tags. Sometimes, visitors may need to know this information.
In this article, we will show you how to display post meta data in WordPress posts easily.
Why Display Blog Post Meta Data on Your WordPress Website?
Blog post meta data is information about a post that’s not part of the actual content. It includes things like the publication date, the name of the author if you are running a multi-author WordPress blog, categories and tags, custom taxonomies, and more.
This meta data can appear in lots of different locations, depending on your WordPress theme.
Wherever it appears, meta data can help visitors learn more about your content. It can also help them discover other interesting posts. For example, they may look for more blogs written by the same author.
In this way, post meta data can improve the user experience and may even increase pageviews. Just be careful about displaying too much post meta data, as it can make your site look messy and confusing.
With that being said, let’s see how you can display post meta data in WordPress themes. Simply use the quick links below to jump straight to the method you want to use:
Method 1: Using the WordPress Theme Customizer (Easy)
Some themes allow you to customize the post meta data without writing any code.
To check whether this is the case for your theme, just go to Appearance » Customize, which opens the WordPress theme customizer.
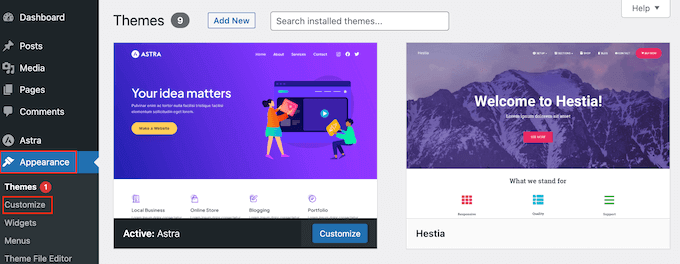
You can now look for any settings that allow you to customize your blog pages. These will typically be labeled ‘blog,’ ‘blog settings,’ ‘posts’ or similar.
For example, if you are using the Astra WordPress theme, then you can simply select ‘Blog’ from the left-hand menu.
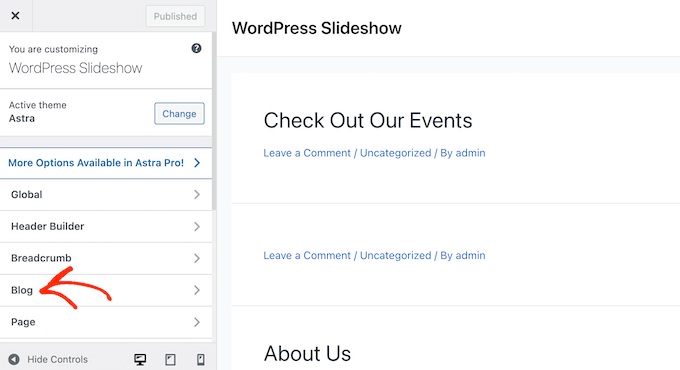
After that, click on ‘Blog / Archive.’
Simply scroll to the ‘Meta’ section to see all the different data that you can add or remove.
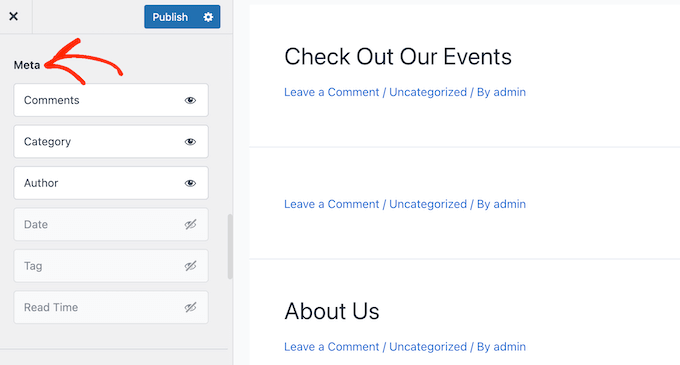
To add meta data to your site, just click on its ‘show’ icon, which looks like an eye.
To remove a piece of meta data, click on the icon again.
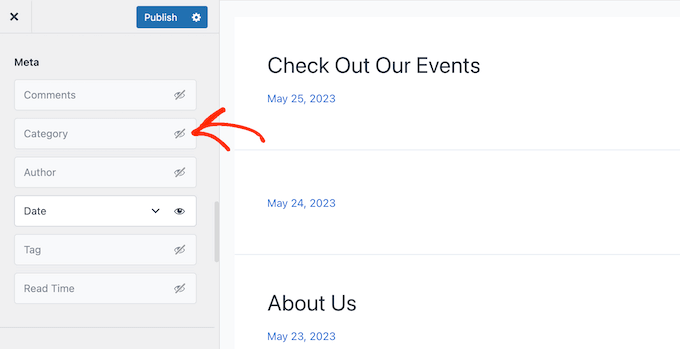
You can also change the order that WordPress shows this meta data to visitors using drag and drop.
As you make changes in the theme customizer, the live preview will update automatically, so you can try different settings to see what looks the best for your WordPress website.
When you are happy with how the post meta data looks, don’t forget to click on ‘Publish’ to make your changes live.
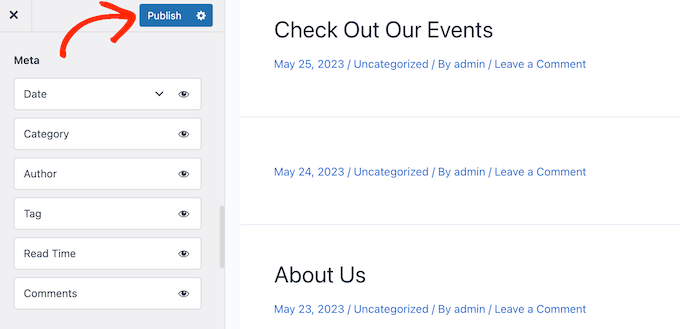
Even if you don’t see any post meta data settings in the WordPress customizer, there may still be a way to add this information without writing code.
With that in mind, we recommend looking at the theme’s documentation. You can also reach out to the theme’s developer for help.
For lots of useful tips, please see our guide on how to properly ask for WordPress support and get it.
Method 2: Using the Full-Site Editor (Block Themes Only)
If you are using a block-based theme like Hestia Pro, then you can display post meta data anywhere on your website using the Post Meta block.
To get started, just go to Themes » Editor in the WordPress dashboard.
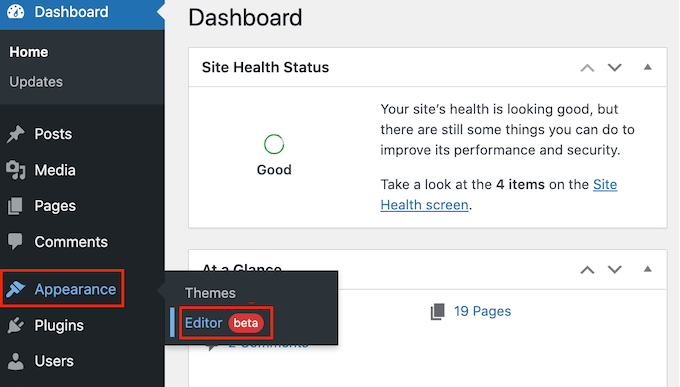
By default, the full-site editor will show your theme’s home template.
To add the meta data to your WordPress blog posts, go ahead and click on ‘Templates’ in the left-hand menu.
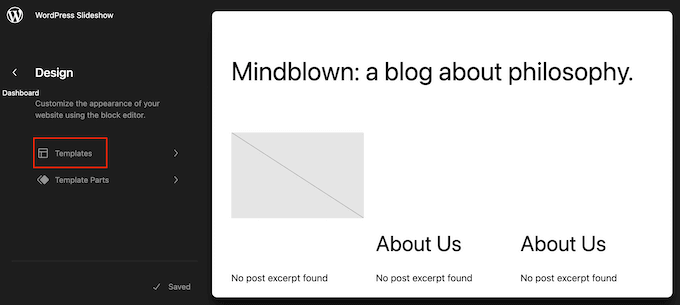
The editor will now show a list of all the templates that make up your WordPress theme.
Simply click on the Single template, which controls the layout of your blog posts.
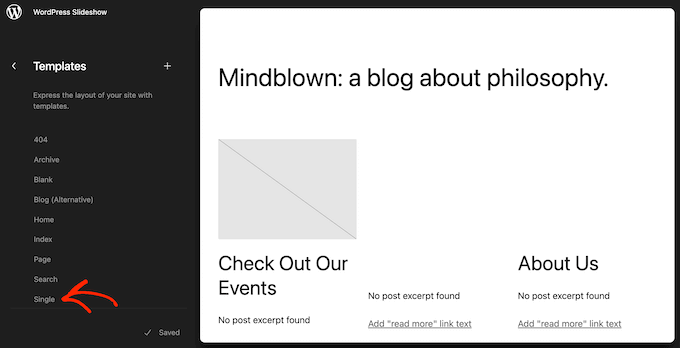
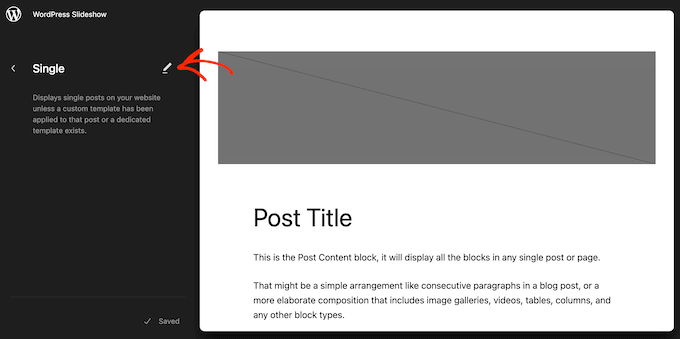
WordPress will now show a preview of the Single page template.
To edit this template, go ahead and click on the small pencil icon.
With that done, click on the blue ‘+’ icon in the top left corner.
In the search bar that appears, type in ‘Post Meta.’
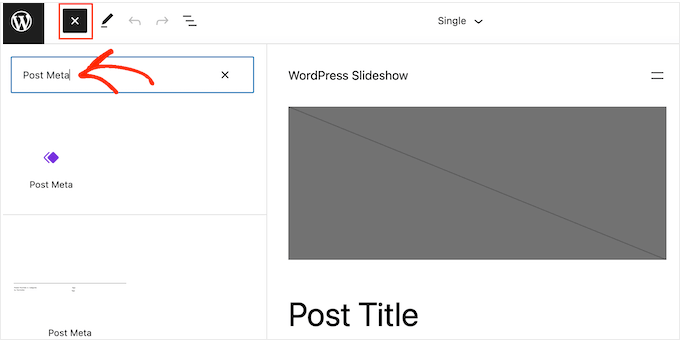
When the right block appears, drag and drop it onto your blog layout.
By default, this block will show the post’s categories, author, and tags.
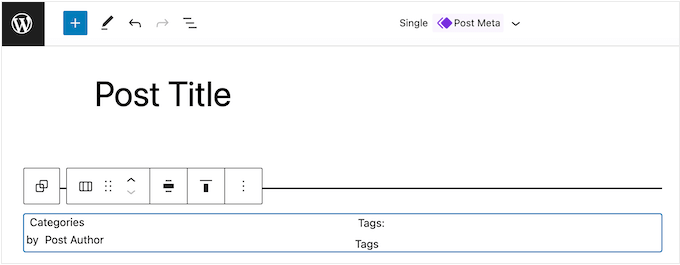
You may want to edit this meta data. For example, you might delete the tags or change the static text that WordPress shows before the meta data.
The following image shows an example of how the default Post Meta block will look on your WordPress blog.
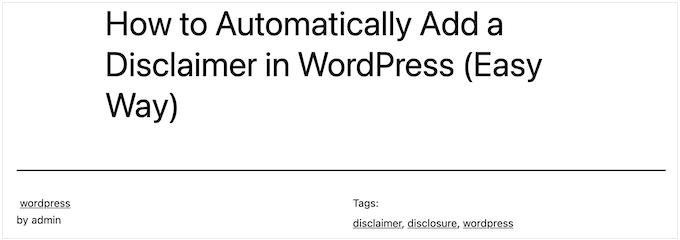
To change this block, simply click to select it in the full site editor. You can then click on any block within the Post Meta block and make your changes.
Just pay careful attention to whether you are editing the static text that WordPress shows in front of the meta data or the dynamic text that WordPress will replace with real values.
For example, in the following image, we have added some static text to the Post Author section.

However, we haven’t changed the ‘Post Author’ dynamic text.
In the following image, you can see how this will look on your WordPress blog.

You may also want to add more meta data to the Post Meta block.
For example, the full site editor has blocks, such as Post Date and Post Author Biography, that you can easily add to the Post Meta block using drag and drop.
Simply click on the blue ‘+’ button and then find the block that you want to use. You can then drag and drop it onto the Post Meta block.
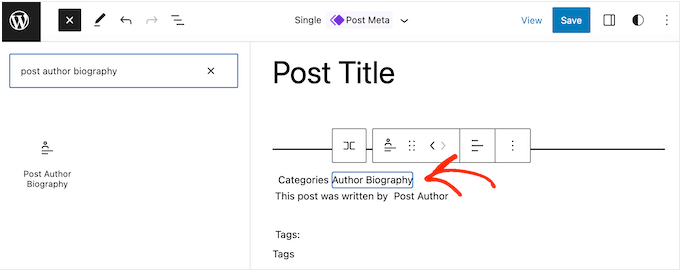
If you add more blocks to the Post Meta block, then you may need to change its layout.
To do this, simply click on the Post Meta block and then select the ‘Block’ tab.
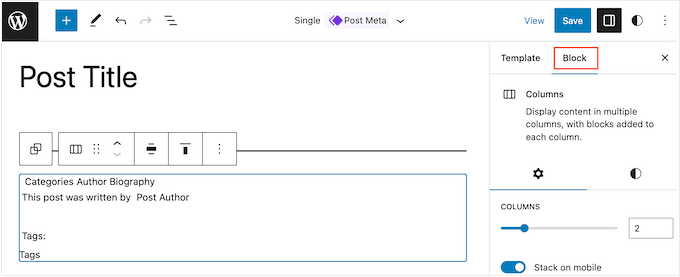
You can now use these settings to arrange the content in a nice layout. For example, you might change the number of columns or add margins and padding.
When you are happy with how the Single template looks, click on the ‘Save’ button.
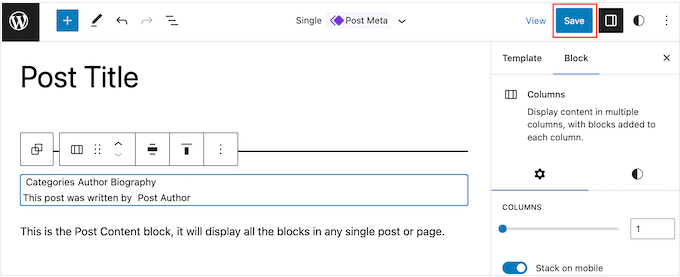
Now if you visit your website, you will see the post meta data in action.
After that, you may want to add post meta data to other areas of your website, such as your custom archive page.
To do this, simply open the full site editor by following the same process described above.
You can then select ‘Templates’ from the left-hand menu and choose the template you want to edit.
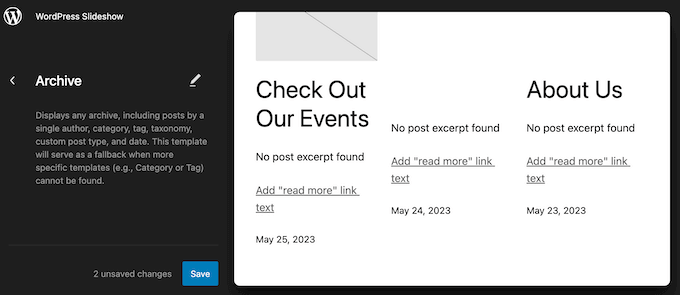
After that, you can add post meta data following the same process described above.
Method 3: Creating a Custom WordPress Theme (Fully Customizable)
Another option is to create a custom WordPress theme. This is a more advanced method, but it will give you complete control over where the post meta data appears on your website.
In the past, you would need to follow complicated WordPress tutorials and write code to build a custom WordPress theme. However, it’s now possible to create your own themes without writing a single line of code using SeedProd.
SeedProd is the best drag and drop WordPress page builder and also comes with a theme builder. This allows you to design your own themes using a simple drag and drop editor.
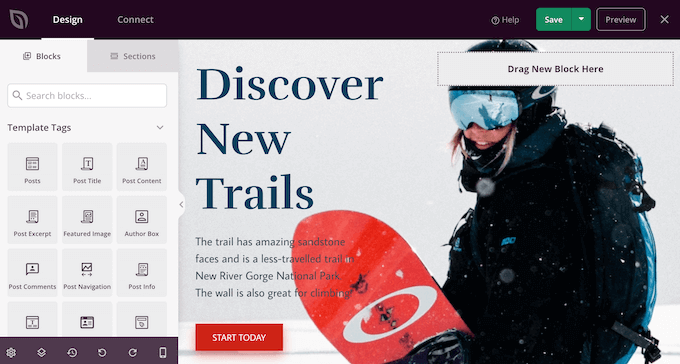
For step-by-step instructions, please see our guide on how to create a custom WordPress theme (without any code).
After that, you can add post meta data to any part of your WordPress website. Simply find the ‘Post Info’ block in SeedProd’s left-hand menu.
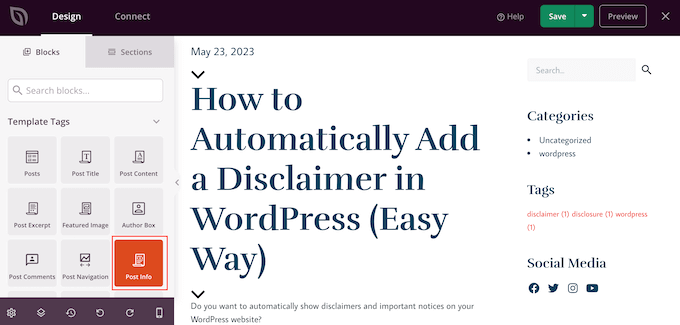
Now, drag and drop the block onto your page layout.
After that, click to select the Post Info block. By default, this block shows the author, date, time, and comments meta data.
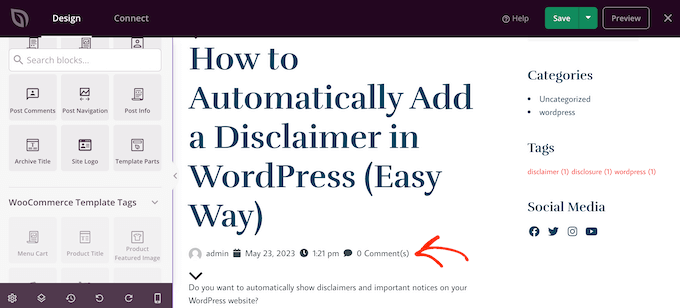
However, you can also show the modified date, modified terms, and terms meta data.
To add more information to the block, simply go ahead and click on ‘Add Item.’
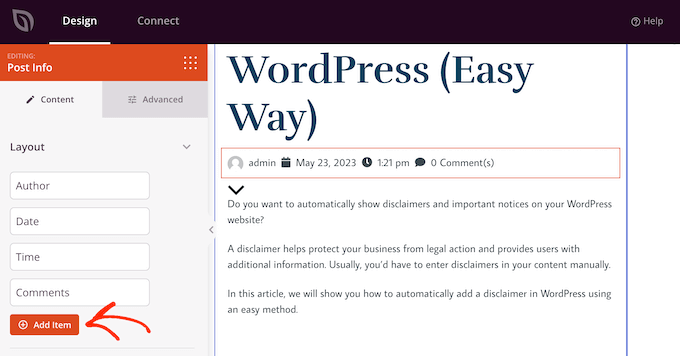
This adds a new placeholder item.
Now, go ahead and click on the item to see all its settings.
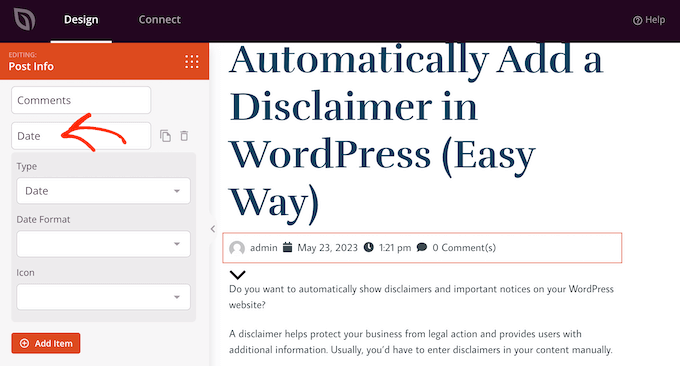
Now, open the ‘Type’ dropdown and choose the type of meta data you want to display.
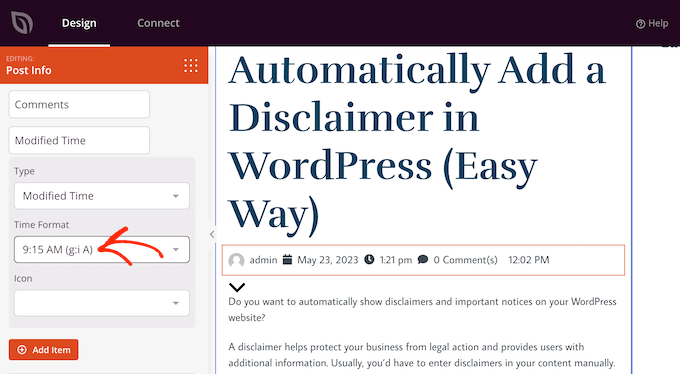
Depending on the option you choose, you will get access to some additional settings. For example, if you selected ‘Modified Time’, then you can choose the time format.
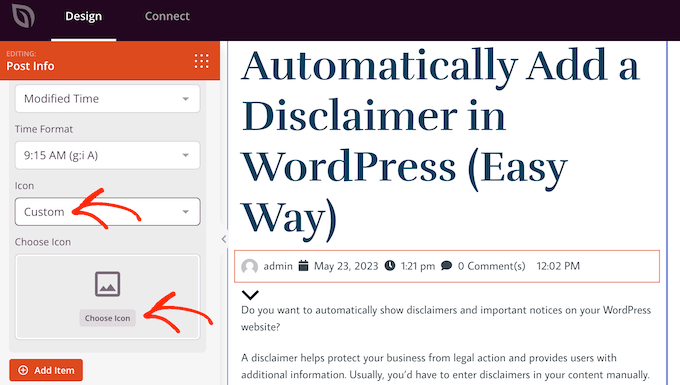
You can also change the icon that SeedProd uses for the meta data item. Simply open the ‘Icon’ dropdown and then choose ‘Custom.’
You can then go ahead and click on ‘Choose Icon.’
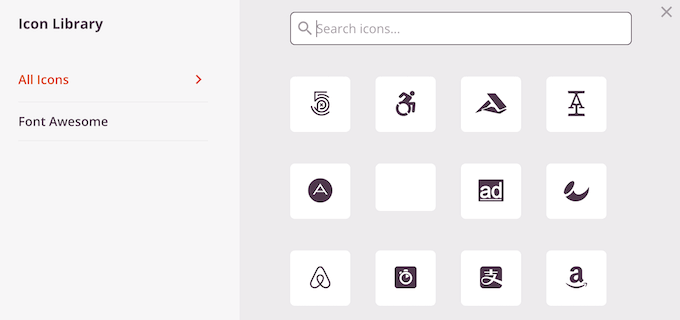
This brings up the icon library with hundreds of icons to choose from. You can use the search bar to look for a specific icon or browse through the entire list.
When you find an image you want to use, simply hover over it and then click the ‘Plus’ button to add it to your page.
Do you want to remove a meta data item instead?
Then simply hover your mouse over it and then click on the trash can icon when it appears.
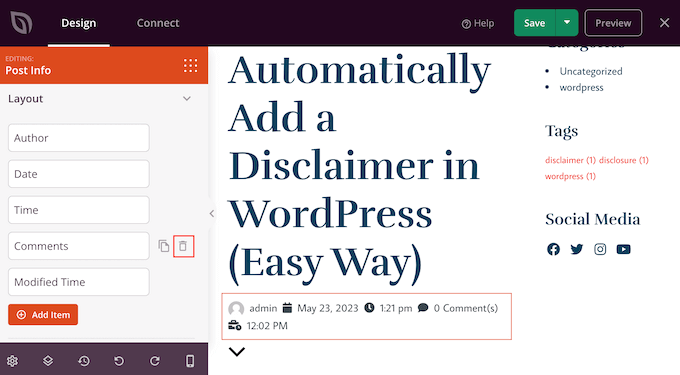
Finally, you can change the order of the meta data items using drag and drop.
When you are happy with how the Post Info box is set up, you may want to change how it looks by selecting the ‘Advanced’ tab.
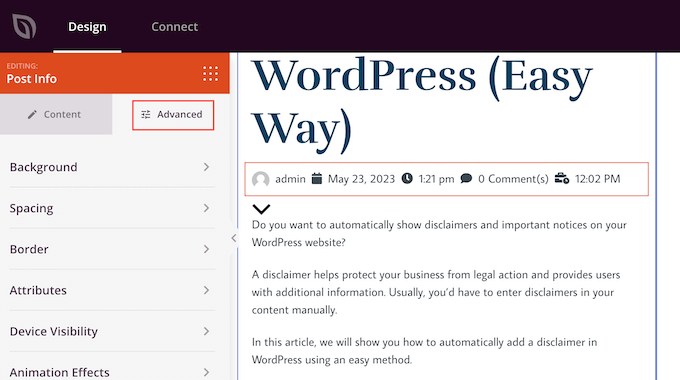
Here, you can change the spacing, add a border, and even add CSS animation effects.
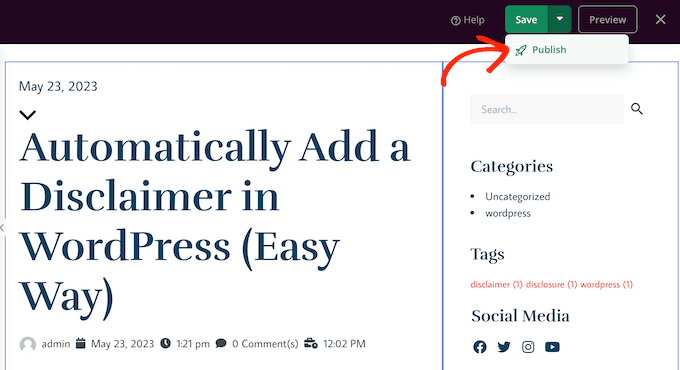
When you are happy with how the page looks, just click the ‘Save’ button and then choose ‘Publish’ to make it live.
Method 4: Editing Your Theme Files (Advanced)
You can also add meta data using code. This method is more advanced, but it allows you to control exactly what meta data WordPress shows to visitors and where that information appears on your site.
If you haven’t added code to your site before, then check out our step-by-step guide on how to copy and paste code in WordPress.
You can modify the individual theme files directly, but this makes it difficult to update your WordPress theme without losing customization. For this reason, we recommend overriding the theme files by creating a child theme.
If you are creating a custom theme, then you can add or modify the code in your existing theme files.
There are lots of ways to display post meta data in a WordPress theme. Some themes will have simple code that’s located below the post title, as you can see in the following example:
By <?php the_author_posts_link(); ?> on <?php the_time('F jS, Y'); ?> in <?php the_category(', '); ?> <?php edit_post_link(__('{Edit}'), ''); ?>
The code above simply displays the author’s name, post date, and categories.
Other themes may use their own template tags, functions, and classes to show meta data. Then, the theme files that are responsible for displaying posts can use these functions.
Usually, you will find post meta data code in your theme’s index.php, single.php, archive.php, and individual content templates such as single-layout.php.
If you are unsure where to look, then please see our beginner’s guide to WordPress template hierarchy.
Now we have covered that, let’s take a look at some examples of how to display different post meta data in your WordPress blog.
How to Display or Hide Post Date in WordPress
To display the post’s publication date, you need to add the following PHP code to your theme:
<p>This article was published on: <?php the_time('m/j/y g:i A') ?></p>
This code simply shows the time and date when you published the post.

Pay special attention to the characters inside the_time function. These are called format characters, and they tell PHP how to format the date and time.
If you want to hide the date meta data at any point, then simply find the code with the_time or the_date functions in your theme files and delete those lines.
How to Display the Last Update Date for WordPress Posts
By updating old articles, you can keep your website fresh and interesting and improve your WordPress SEO.
If you regularly update old content, then you may want to show the date when a post was last updated. This can make your content seem more relevant and interesting to visitors, who may not be interested in posts that were published years ago.
Luckily, it’s super easy to display the last update date for WordPress posts using WPCode. It is the best code snippets plugin that allows you to edit your theme files without writing code.
For detailed instructions, please see our complete guide on how to display the last update date of your posts in WordPress.
To display the author name, you need to add the following code to your theme files:
<p>This article was written by <?php the_author(); ?></p>
This code uses the_author tag, which shows the author name only:

Sometimes, visitors may want to read more posts by their favorite author. With that in mind, you can link to the author’s page by replacingthe_author tag with the the_author_posts_link, as shown in the code below:
<p>View all articles by <?php the_author_posts_link(); ?></p>
If you want to hide the author’s name at any point, then simply find the the_author or the_author_posts_link tags in your theme files and delete them.
How to Show or Hide Categories in WordPress Posts
Categories can help readers find related content, which will improve the user experience and keep them on your website for longer.
You can show the categories meta data using the following code:
<p>This post was filed under: <?php the_category(', ') ?></p>
In the following image, you can see how the categories will look to your readers:

As you can see, the code shows all the post’s categories separated by a comma. You can replace the comma with any character you want to use by editing the code snippet above.
If you want to remove category meta data from your WordPress posts, then just find the line with the_category tag in your theme files and delete it.
Similar to categories, tags can help visitors find more content they are interested in reading.
To show the tags post meta data, simply add the following code to your theme files:
<p>Tags: <?php the_tags(); ?></p>
This code will show all the post’s tags separated by a comma.

You can replace the comma with any character you want. For example, here, we are showing tags separated by a slash.
<?php the_tags( 'Tags: '/ ', ', '<br />' ); ?>
As you can see, the_tags function accepts three different values, known as parameters.
the_tags($before, $separator, $after)
You can use the before and after parameters to add any text or code that you want to show next to the tags. This allows you to add CSS classes and then use them to change how the tags look on your website.
Let’s take a look at an example:
<?php the_tags('<div class="wpb-tags">Tags: ', ' ', '</div>');
If you want to hide the tags from your readers at any point, then find the line with the_tags() code in your theme files, and delete it.
If you are comfortable adding custom code to your WordPress website, then you can show a lot more meta data to your visitors.
For example, you can use custom fields to add your own meta data to WordPress posts. Another option is to create custom meta boxes to display the custom fields.
We hope this article helped you learn how to display blog post meta data in your WordPress themes. You may also want to see our guide on how to create a landing page with WordPress or see our expert picks for the best landing page plugins.
If you liked this article, then please subscribe to our YouTube Channel for WordPress video tutorials. You can also find us on Twitter and Facebook.
Leave A Comment
You must be logged in to post a comment.