Do you want to add a recent comments page to your WordPress website?
Displaying all of your most recent comments on one page is a great way to highlight the discussion happening on your website. With WordPress, creating a page like this is easy, thanks to the Latest Comments block.
In this guide, we will show you how to create a recent comments page in WordPress.
Why Make a Recent Comments Page?
Comments play an important role in building a community around your WordPress website. They allow readers to participate in discussions and interact with you.
With a recent comments page, new and returning visitors can see the ongoing discussions and keep up with them across your site.
Comments are also a great engagement signal and social proof for new visitors. Through the recent comments page, users can see that you have an active and passionate community. This can encourage them to stay longer on your website and perhaps even join the conversation.
Many WordPress blogs choose to display their most recent comments in a widget area, like the sidebar. However, the recent comments widget can be a bit narrow and difficult to read.
That’s why we recommend creating a recent comments page. If you want, you can even link this page at the bottom of the recent comments widget on the sidebar. This way, visitors can read the comments in more detail.
In this step-by-step guide, we will show you how to create the recent comments page using two methods: WordPress’ built-in Latest Comments block and SeedProd, the best WordPress page builder on the market.
You can use the quick links below to navigate through this tutorial:
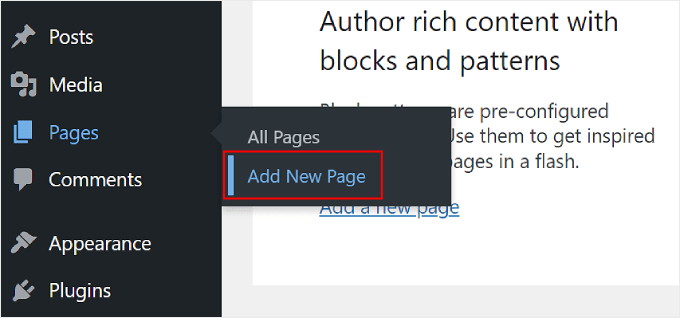
First, you need to open your WordPress dashboard and navigate to Pages » Add New Page.
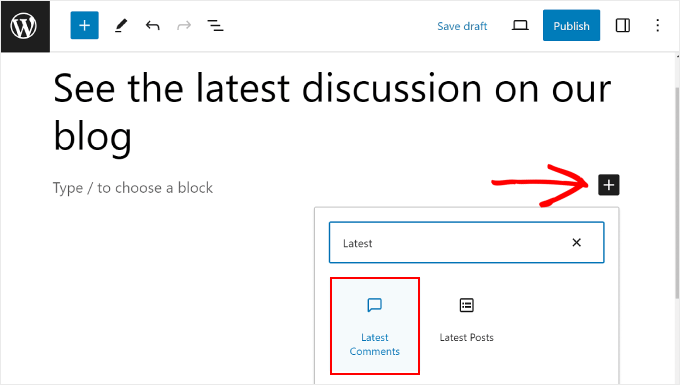
After that, you need to add a title to the page. You can use something like “See the latest discussion on our blog” or “Read our most recent comments.”
Once that’s done, just click the ‘+’ add block button below the title or in the top left corner and locate the Latest Comments block. You can drag and drop it wherever you want on your page.
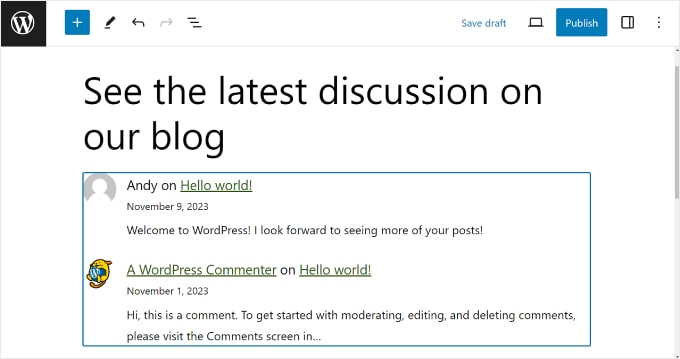
By default, the block editor will display the comment author’s name, the comment excerpt, the comment date, the commenter’s gravatar, and a link to the post where the comment is.
Here’s what it looks like:
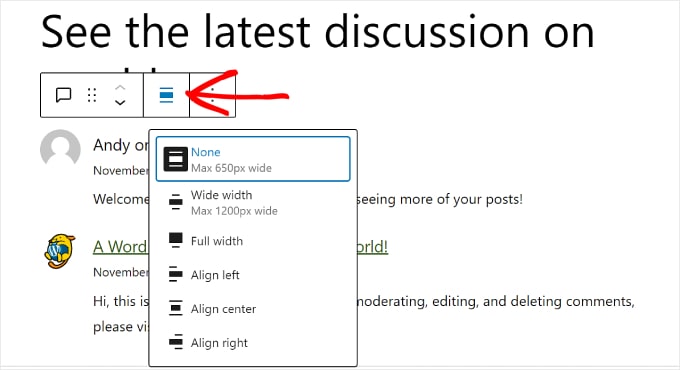
If you want to customize the block’s appearance, then you can click the ‘Align’ button in the block toolbar. This button lets you adjust the block’s alignment settings.
You can choose between using no alignment, wide width, full width, or aligning the block to the left, center, or right.
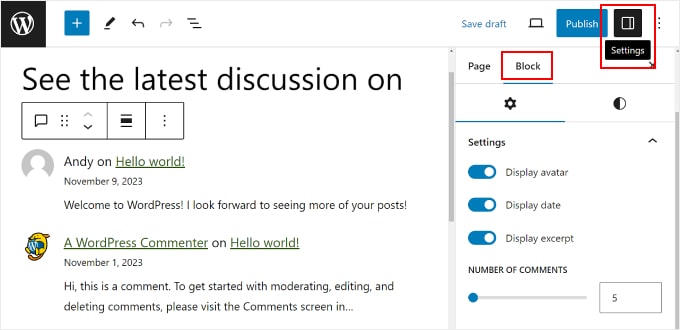
Additionally, you can click the ‘Settings’ button in the top right corner and switch to the ‘Block’ tab.
Here, you can choose to display or disable the gravatar, the comment date, and the comment excerpt. You can also select how many comments you’d like to display on your page.
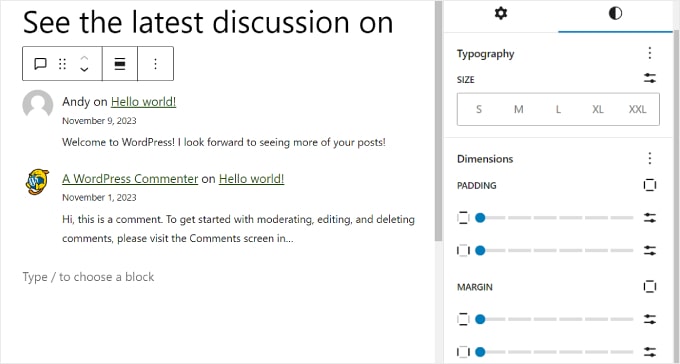
If you open the block’s ‘Styles’ tab, you can edit the block’s Typography, which controls the fonts being used in the block. You can also modify the Dimensions, which control the block’s padding and margin.
Feel free to play around with these settings to make the comments more readable and attractive with your WordPress theme.
Once you are done, you can click the ‘Preview’ button in the top right corner to see what the page looks like on a desktop, mobile, or tablet device.
Then, click ‘Save draft’ to save the page without publishing it. Or you can click ‘Publish’ if you want to make the page publicly available right away.

And that’s it! You’ve successfully created a recent comments page in WordPress.
Method 2: Create a Custom Recent Comments Page With SeedProd
If you are looking to create a completely custom recent comments page in WordPress, then we recommend using a page builder plugin like SeedProd.

SeedProd comes with tons of customization options that the built-in block editor doesn’t have, like animated effects. That’s why we recommend this method if you want to make your recent comments page truly unique and stand out.
First, go ahead and install the SeedProd plugin in WordPress. For more information, you can read our beginner’s guide on installing a WordPress plugin.
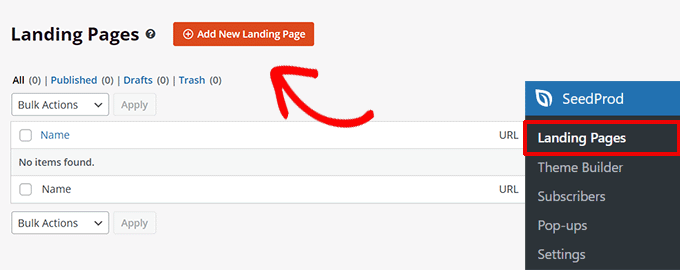
Next, you want to go to SeedProd » Landing Pages. After that, click the ‘+ Add New Landing Page’ button.
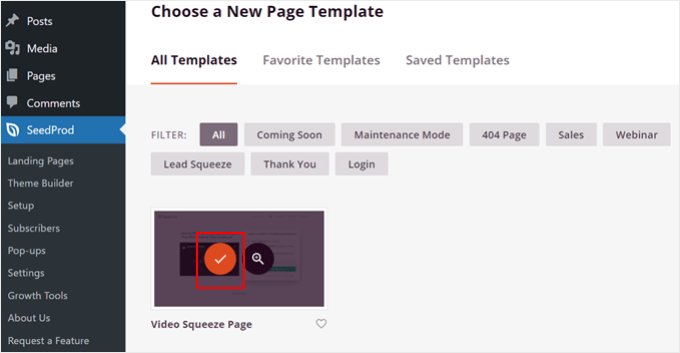
On the next screen, you can choose a landing page template for your recent comments page.
In this case, we will use the ‘Video Squeeze Page.’
Now, go ahead and give your new landing page a name and URL.
We have named our landing page ‘See Our Latest Comments’ and given it the URL ‘/latest-comments’ to keep it simple. Once you’ve completed this step, just click the ‘Save and Start Editing the Page’ button.
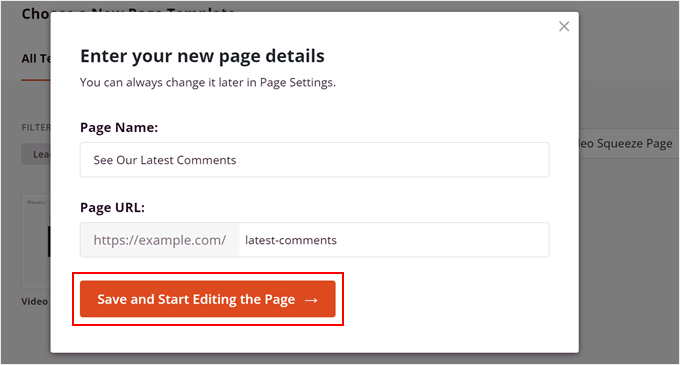
You will now arrive at the page builder interface. Before you add the latest comments, you may want to customize how the page looks overall first.
For this, we recommend watching our WPBeginner video tutorial on getting started with SeedProd.
Here, we have deleted some of the elements from the original landing page template and adjusted the copy to suit the purpose of this guide.
Now, in the left-side block panel, look for the ‘Recent Comments’ widget and drag and drop it wherever is appropriate.
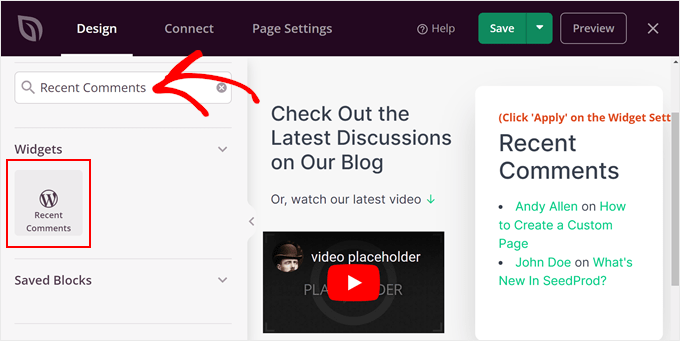
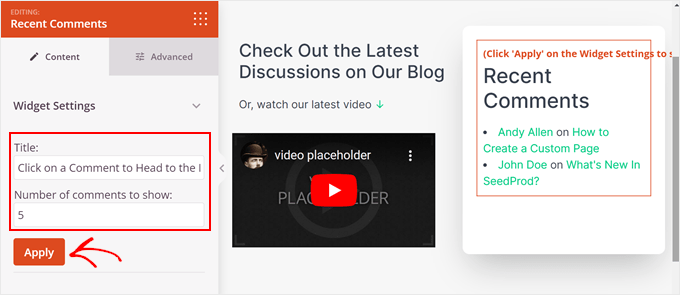
After you drag and drop the widget to the page builder, go ahead and click on the widget itself. The left-hand panel will then show you some settings to modify how the widget looks.
In the ‘Content’ tab, you can change the title of the widget and how many comments to show. Once you are happy with it, click ‘Apply.’
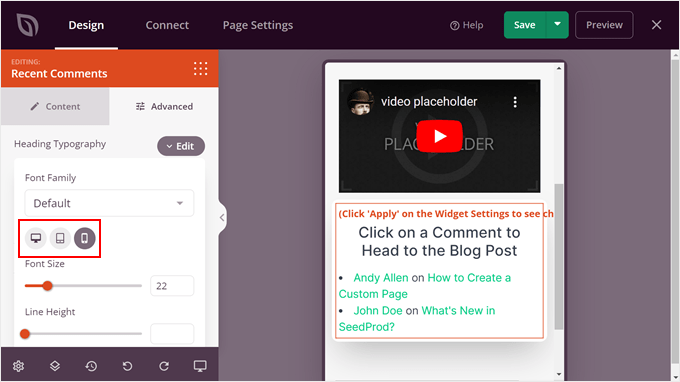
If you switch to the ‘Advanced’ tab, you’ll see more settings for the block’s typography, spacing, CSS attributes, device visibility, and animation effects.
At the top, we’ve adjusted the heading’s font size for desktop, tablet, and mobile devices. This way, the text looks good no matter where it’s viewed.
Once you are happy with how the widget looks, you can add more blocks to the page. For example, you can add dynamic content to it, use an animated background, use a custom shape divider, and so on.
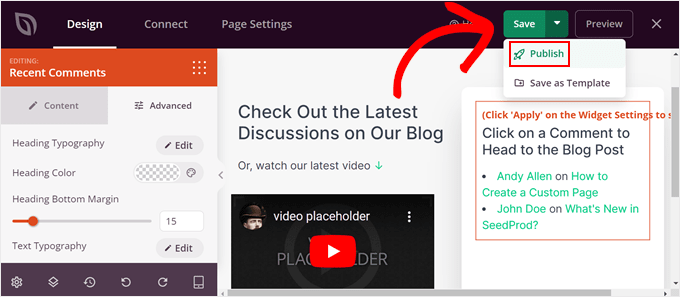
Then, when you are satisfied with the page’s design, just click the dropdown menu under the ‘Save’ button and click ‘Publish’ to make the page live.
Alternative: Thrive Architect is another great option for designing custom pages on your website. For more details, see our Thrive Architect review.
We’ve shown you how to display the latest comments from your WordPress posts on a separate page. Now, let’s discuss how to make your comments section even better.
One method to always moderate your comments. Remember that the Latest Comments block and the Recent Comments widget will automatically display any new comment that gets approved.
Let’s say you don’t moderate these comments, and the block unintentionally shows a harmful message sent by a user. That comment can negatively impact your brand and community.
The purpose of comment moderation is to make sure that no inappropriate or spammy comments are displayed. This way, your comment section can always be a safe space for users to share their thoughts with each other.
For step-by-step guidance, see our beginner’s guide on how to moderate comments in WordPress.
Another thing you can do is use a WordPress comment plugin. It can boost your comment engagement and make users explore more of your content.
For this, we recommend using Thrive Comments, which is an easy-to-use WordPress plugin that can improve your comment section. It comes with features to encourage quality comments and manage discussions, like comment upvotes/downvotes and likes/dislikes.

Additionally, Thrive Comments lets you add a post-comment action. After users leave a comment text, you can show them a related post, encourage them to share the blog post, or ask them to fill out a lead-generation form.
Here are some guides showing how you can use Thrive Comments in your comments section:
We hope this article has helped you learn how to create a recent comments page in WordPress. You may also want to see our guide on how to display your top commenters in the WordPress sidebar and how to display the most accurate number of comments in WordPress.
If you liked this article, then please subscribe to our YouTube Channel for WordPress video tutorials. You can also find us on Twitter and Facebook.
Leave A Comment
You must be logged in to post a comment.